
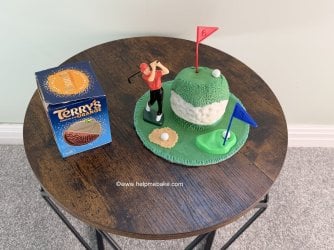
Hi lovelies! If you’re looking for a fun edible gift for golfers, birthdays, Father’s Day, retirements, or just celebrating a brilliant round of golf, then this Terry’s Chocolate Orange golf ball gift is for you.
It’s quick, beginner‑friendly, and uses a few bits from the 13‑piece PME golf decorating kit to build a cute little golf scene. No stress, no fuss, just roll, smooth, stick, and smile. They’ll be shouting “Great shot!” before they even taste it. So get the fondant at the ready and let’s tee off.
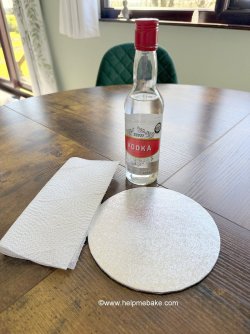
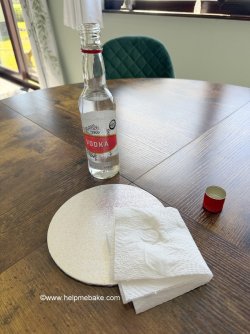
To do this, fold a few sheets of kitchen roll, hold them over the top of the vodka bottle, then flip the bottle upside down and back upright in one swift movement so a little vodka absorbs into the paper. Give your board a gentle wipe to clean away any dust or dirt.
Next take your chocolate orange.
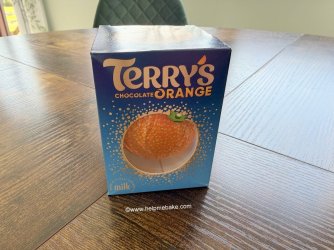
Remove it from the box and place it against your board to check the size. This ensures you’re working with the correct board size.
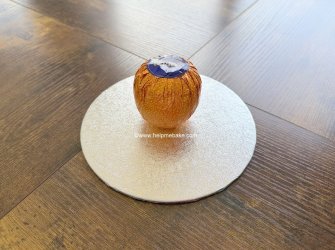
Then open the Chocolate Orange, as you can see in the photo, some of the segments are already loose.
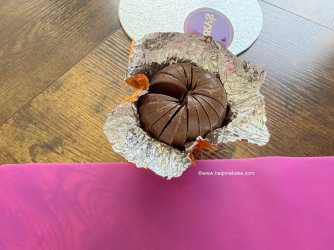
This can be resolved by taking a small piece of icing.
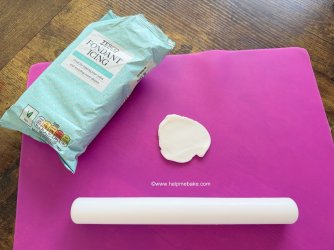
And sticking it to the top of the segments with edible glue. (If you prefer, melt a little chocolate, place in a piping bag and pipe a small blob of melted chocolate on the top, this will hold the segments in place when dried).
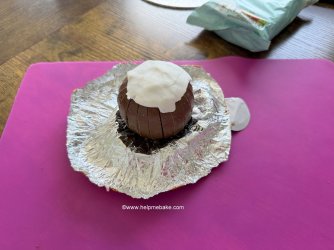
Mop up any flakes of chocolate with a small piece of icing so you don't end up with chocolate bits in your white icing for the golf ball.
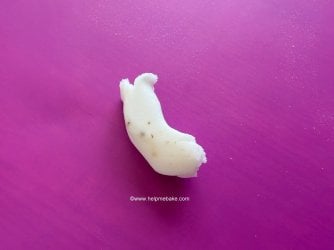
Now take some white icing about 150 grams.
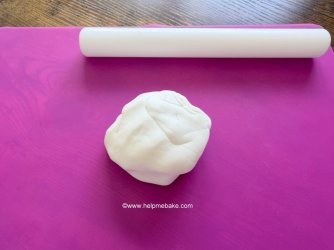
Roll it out so it’s slightly thick, this gives you enough depth to make your indents later and ensures it will cover the whole Chocolate Orange. Set it aside.
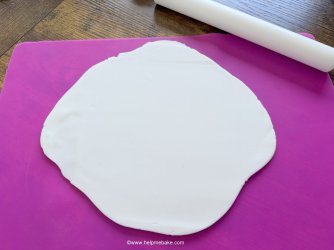
Lightly coat the chocolate orange with edible glue.
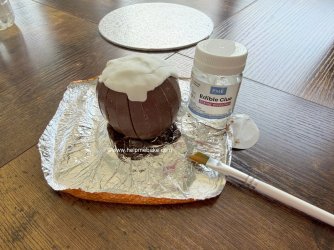
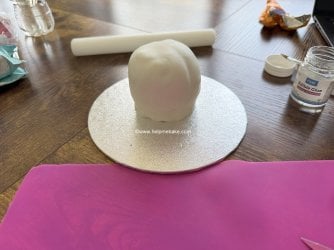
I then draped the white fondant over the chocolate orange and smoothed it down gently with my hands.
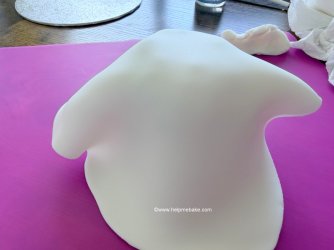
Until it was completely covered.
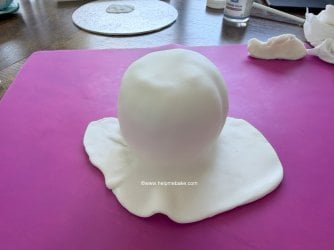
Then I carefully trimmed away the excess at the bottom, leaving just enough to tuck underneath.
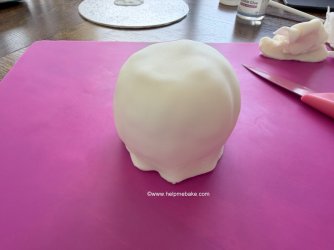
I then stuck a little white icing to the board with edible glue.
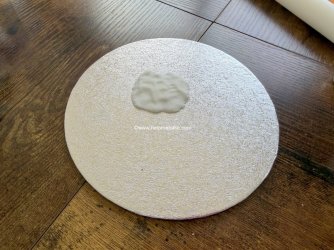
I then placed the 'golf ball choc orange' onto the white icing so it stuck to the board.
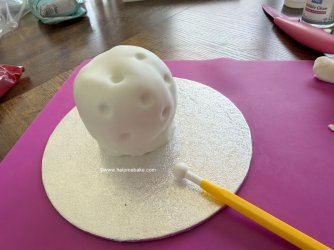
To add a realistic texture, I used the small end of my ball tool to gently press little indents over the surface. Take your time and use a light touch. You need a happy medium with this. You need more indents so it doesn't look like the moon, but not too many so that it's too dimpled. A few details go a long way as you want texture, not a cratered moon.
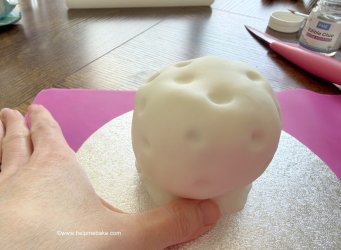
Smooth off around the base with your thumb. (I added more indents after this).
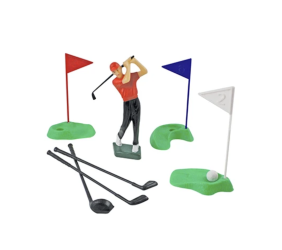
Then open the PME golf kit.
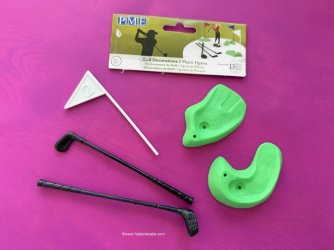
See which pieces of the kit you want to use.
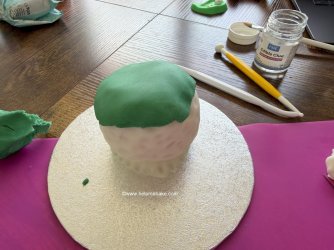
Roll out a small piece of emerald‑green icing and place it on top, securing it with a dab of edible glue.
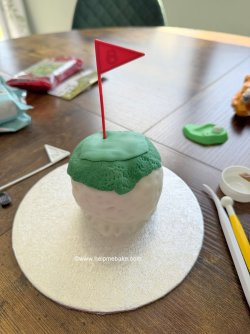
Now take a little emerald‑green icing and mix in a touch of white icing to create a lighter shade. Shape it and place it neatly on top of the piece you’ve just added to the ‘golf ball’. Finish by popping a flag from the kit on the top.
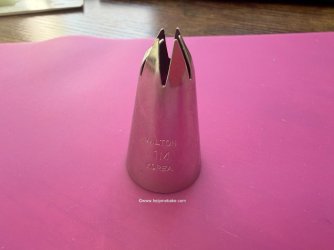
Stipple the darker green grass with the top of a piping nozzle. I used my 1M nozzle.
I then added another extra layer of the stippled grass around the outer edge to encase the lighter grass that we had just placed on.
Now the really fun bit – building the design! I took a few pieces from the kit and placed them on the board to see which ones I wanted to use.
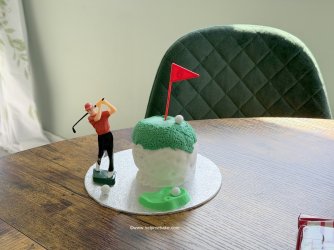
I then rolled out some emerald‑green icing large enough to cover the board. It’s usually easier to do this first, but if you prefer, you can add it later and gently work it around the Chocolate Orange golf ball, as I did. Once the piece is big enough add a touch of edible glue with a paintbrush and stick the icing to the board, Cut off any excess with a knife.
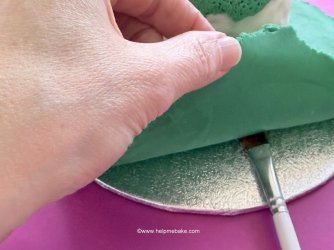
Feel free to play around with the layout until it looks like a mini golf course. I then took a little edible glue and placed a little on the green icing, I then positioned the golfer like he’s about to take his shot, added the tees then placed the flags and the miniature golf balls from the set on the icing to create a scene then pushed them downwards into the icing.
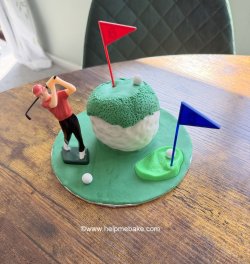
I then took my dresden tool and embossed the outer edge of the board to make a 'grass' edge to give it a little texture.
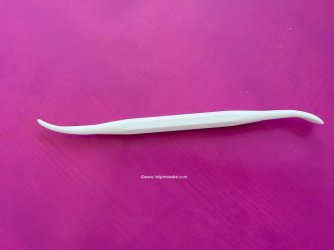
I also placed a touch of green icing under the front of the golf ball to look as though it's sat in the grass. I used the dresden tool again to create grass strokes.
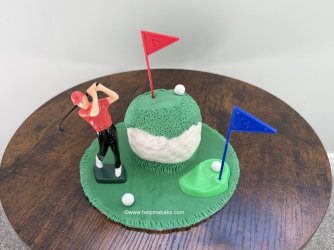
If you fancy a sand trap, add a touch of edible glue and sprinkle a little brown sugar on to the board, flatten it down with the back of a teaspoon, and remove any excess with a dry paintbrush. Et voilà! A perfect golf scene, ready to eat.
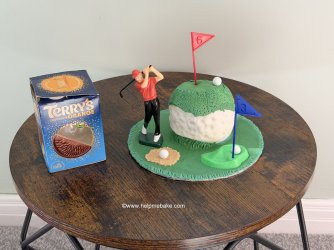
Tips
Storage - Pop your finished golf gift in a cool, dry place away from direct sunlight. It’ll look fab for a few days and the chocolate inside stays perfect. Best enjoyed soon after making so the icing/fondant stays soft and the surprise is fresh!
There you have it, a golf-themed Terry’s Chocolate Orange that’s guaranteed to score a massive smile! I hope this tutorial brings you just as much fun making it as it did me.
Happy baking, happy golfing, and may all your gifts be eagle-worthy!
It’s quick, beginner‑friendly, and uses a few bits from the 13‑piece PME golf decorating kit to build a cute little golf scene. No stress, no fuss, just roll, smooth, stick, and smile. They’ll be shouting “Great shot!” before they even taste it. So get the fondant at the ready and let’s tee off.
Ingredients
- 1 x Terry’s Chocolate Orange
- 150 Grams – White icing/fondant (for the golf ball)
- 65 Grams – Emerald Green cing/fondant (for the base and top)
- Piping gel or edible glue (not water as it can make the chocolate bloom or cause the icing to slide as it does not adhere to the chocolate orange)
- A splash of vodka (for cleaning the board)
- PME 13-piece golf decorating food grade plastic figures (golfer, flag, tee, clubs, balls – use whichever suit you or make your own)
- Optional: A little brown sugar for a sand trap effect
Equipment
- Small rolling pin
- Dresden tool, toothpick or veining tool (for texture and grass effect)
- Ball tool or the end of a paintbrush (great for dimples)
- 5–6 inch thin cake board
- A few sheets of Kitchen towel to clean the board
- 1M Piping nozzle or disposable toothbrush fro grass indents (If you have a grass piping nozzle use that instead)
- Knife or scalpel for excess icing
- Clean paintbrush (for vodka and glue)
- Silicone mat or clean work surface
- Food gloves (recommended if gifting)
Method
I began by giving my cake board a quick wipe over with vodka to ensure it was clean.To do this, fold a few sheets of kitchen roll, hold them over the top of the vodka bottle, then flip the bottle upside down and back upright in one swift movement so a little vodka absorbs into the paper. Give your board a gentle wipe to clean away any dust or dirt.
Next take your chocolate orange.
Remove it from the box and place it against your board to check the size. This ensures you’re working with the correct board size.
Then open the Chocolate Orange, as you can see in the photo, some of the segments are already loose.
This can be resolved by taking a small piece of icing.
And sticking it to the top of the segments with edible glue. (If you prefer, melt a little chocolate, place in a piping bag and pipe a small blob of melted chocolate on the top, this will hold the segments in place when dried).
Mop up any flakes of chocolate with a small piece of icing so you don't end up with chocolate bits in your white icing for the golf ball.
Now take some white icing about 150 grams.
Roll it out so it’s slightly thick, this gives you enough depth to make your indents later and ensures it will cover the whole Chocolate Orange. Set it aside.
Lightly coat the chocolate orange with edible glue.
I then draped the white fondant over the chocolate orange and smoothed it down gently with my hands.
Until it was completely covered.
Then I carefully trimmed away the excess at the bottom, leaving just enough to tuck underneath.
I then stuck a little white icing to the board with edible glue.
I then placed the 'golf ball choc orange' onto the white icing so it stuck to the board.
To add a realistic texture, I used the small end of my ball tool to gently press little indents over the surface. Take your time and use a light touch. You need a happy medium with this. You need more indents so it doesn't look like the moon, but not too many so that it's too dimpled. A few details go a long way as you want texture, not a cratered moon.
Smooth off around the base with your thumb. (I added more indents after this).
Then open the PME golf kit.
See which pieces of the kit you want to use.
Roll out a small piece of emerald‑green icing and place it on top, securing it with a dab of edible glue.
Now take a little emerald‑green icing and mix in a touch of white icing to create a lighter shade. Shape it and place it neatly on top of the piece you’ve just added to the ‘golf ball’. Finish by popping a flag from the kit on the top.
Stipple the darker green grass with the top of a piping nozzle. I used my 1M nozzle.
I then added another extra layer of the stippled grass around the outer edge to encase the lighter grass that we had just placed on.
Now the really fun bit – building the design! I took a few pieces from the kit and placed them on the board to see which ones I wanted to use.
I then rolled out some emerald‑green icing large enough to cover the board. It’s usually easier to do this first, but if you prefer, you can add it later and gently work it around the Chocolate Orange golf ball, as I did. Once the piece is big enough add a touch of edible glue with a paintbrush and stick the icing to the board, Cut off any excess with a knife.
Feel free to play around with the layout until it looks like a mini golf course. I then took a little edible glue and placed a little on the green icing, I then positioned the golfer like he’s about to take his shot, added the tees then placed the flags and the miniature golf balls from the set on the icing to create a scene then pushed them downwards into the icing.
I then took my dresden tool and embossed the outer edge of the board to make a 'grass' edge to give it a little texture.
I also placed a touch of green icing under the front of the golf ball to look as though it's sat in the grass. I used the dresden tool again to create grass strokes.
If you fancy a sand trap, add a touch of edible glue and sprinkle a little brown sugar on to the board, flatten it down with the back of a teaspoon, and remove any excess with a dry paintbrush. Et voilà! A perfect golf scene, ready to eat.
Tips
- Work on a silicone mat so everything moves around easily and you can rotate the board as you go.
- If the icing/fondant feels sticky, a tiny dusting of icing sugar on your hands helps.
- The PME plastic figures are food-safe for decoration but aren’t meant to be eaten, just let the lucky recipient know that!
- Want even more grass texture? Lightly press the dresden tool into the icng, or use a grass piping nozzle, a manual toothbrush or a new nail scrubber.
- No ball tool? The rounded end of a paintbrush or even a clean pencil works brilliantly for dimples.
Storage - Pop your finished golf gift in a cool, dry place away from direct sunlight. It’ll look fab for a few days and the chocolate inside stays perfect. Best enjoyed soon after making so the icing/fondant stays soft and the surprise is fresh!
There you have it, a golf-themed Terry’s Chocolate Orange that’s guaranteed to score a massive smile! I hope this tutorial brings you just as much fun making it as it did me.
Happy baking, happy golfing, and may all your gifts be eagle-worthy!
Last edited:

