Hi, I love your madeira cake recipe for the 6 x 3inch cake, I'm making a tiered cake for my daughter's birthday and was hoping to get advice on how to make a 4inch by 3inch madeira cake please.
You are using an out of date browser. It may not display this or other websites correctly.
You should upgrade or use an alternative browser.
You should upgrade or use an alternative browser.
6 x 3 Inch Madeira Cake convert to 4 inch (1 Viewer)
- Thread starter Sonia p
- Start date
-
- Tags
- advice help recipe conversion
Hi @Sonia p
Welcome to the site.") I'm glad you like the recipe.
I'm glad you like the recipe.
I don't have a 4-inch recipe, however, I have managed to convert the recipe using Cakes by Lynz conversion chart.
The converted recipe should be as follows:
I took the surface of the new and old tin and then divided them - 12.56 / 28.26 = 0.44444 I then rounded it to 0.5 and multiplied it by the original recipe to convert to the 4-inch quantities. This gives more even quantities across the recipe however if you prefer you can adjust the recipe to 0.44 and use that. As I say this is a rough guide so it depends on how you want to round with your decimal places. Lynz used 0.44 when converting from a 6-inch to a 4-inch tin so it's entirely up to you.
Here are both conversions to make the 4-inch cake depending on your rounding.
Ingredients: 0.5 Calculation
I would probably bake the cake for roughly 35 - 40 minutes and then check it. You can then decide if it needs more time or not using a skewer.
If you do bake it, could you let me know how you get on either way so we can let other members know whether it works?
Good luck with the cake.
Welcome to the site.
I'm glad you like the recipe.I don't have a 4-inch recipe, however, I have managed to convert the recipe using Cakes by Lynz conversion chart.
The converted recipe should be as follows:
I took the surface of the new and old tin and then divided them - 12.56 / 28.26 = 0.44444 I then rounded it to 0.5 and multiplied it by the original recipe to convert to the 4-inch quantities. This gives more even quantities across the recipe however if you prefer you can adjust the recipe to 0.44 and use that. As I say this is a rough guide so it depends on how you want to round with your decimal places. Lynz used 0.44 when converting from a 6-inch to a 4-inch tin so it's entirely up to you.
Here are both conversions to make the 4-inch cake depending on your rounding.
Ingredients: 0.5 Calculation
- 87.5 Grams Soft Margarine
- 87.5 Grams Caster Sugar
- 1.5 Large Eggs
- 1 Tablespoons Milk
- 112.5 Grams Plain Flour
- Half Teaspoon Baking Powder
- 77 Grams Soft Margarine
- 77 Grams Caster Sugar
- 1.32 Large Eggs
- 0.88 Tablespoons Milk
- 99 Grams Plain Flour
- 0.44 Tsp Baking Powder
I would probably bake the cake for roughly 35 - 40 minutes and then check it. You can then decide if it needs more time or not using a skewer.
If you do bake it, could you let me know how you get on either way so we can let other members know whether it works?
Good luck with the cake.
Hi Angie, so I made the 4x3inch cake to the 0.5 calculation and it turned out brilliantly! Thanks so much for your help! It was a still gooey at 35mins, prob done at 40 but I left it until 45 mins to be on the safe side. I'll try and attatch pics..
Attachments
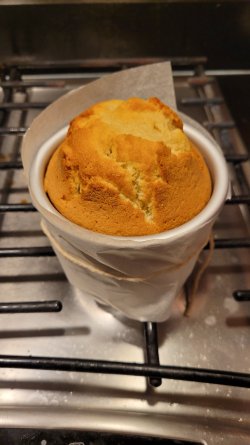

Hi Angie, so I made the 4x3inch cake to the 0.5 calculation and it turned out brilliantly! Thanks so much for your help! It was a still gooey at 35mins, prob done at 40 but I left it until 45 mins to be on the safe side. I'll try and attatch pics..
Hi @Sonia p
Thank you for the feedback. Yeah, I said 35 minutes as a base point so as not to over do it. So not bad for a guess, like you say, the 40 minutes would have probably done it. What I tend to do when it's not done is put it back in for increments of 5 mins and keep checking with a skewer, but to be honest, the extra 10 mins would probably have been bang on.
If you want the cake to have a little more even bake, next time, cover the outer edge of the tin in baking paper and tie it with string the Madeira will then rise more evenly and give you a little less peak. However, I don't mind the peak sometimes as it's a great way to taste-test the cake when you cut it off.

Lol, just looked closely with my glasses and saw you have put paper around the edge. The next time you do it, make the baking paper a touch wider and have it about an inch above the top of your tin if you want a leveller cake. Up to you, you do what works best for you.
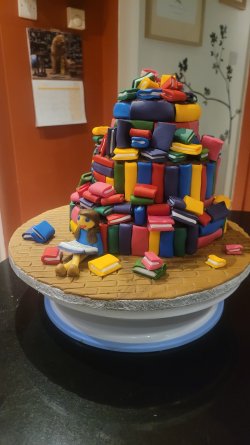
You're overall cake is beautiful, I love the model and all the books. I'm literally in the middle of making my daughter's 18th cake as we speak.
Thanks for coming back and sharing your bakes. I love seeing what people have made.

Glad I could help, and if you need anything else, just let me know.

Hi again, just wondering what the minimum resting/ cooling time should be before putting buttercream on? I may have left things a little late for a Halloween party tomorrowHere is the recipe and guide on how to make a 6 x 3 inch round moist Madeira Cake. This is an excellent choice for a single-tier cake but can also be used for stacking. To lock in the moisture of the cake and prolong its life, I also add a stock/simple syrup to the cake. This is optional, so it's up to you whether you wish to make it or not.
How to make a 6 x 3 inch Madeira Cake.
To start with, please do the following:
Preheat your oven to one of the following temps:
- Fan assisted: 150°C
- Conventional Oven 160°C- 170°C
- Gas Mark 2
- Fahrenheit - 300 - 320F
Ingredients:
- 175 Grams Soft Margarine
- 175 Grams Caster Sugar (Superfine/Castor Sugar - USA)
- 3 Large Eggs
- 2 Tablespoons Milk - (I used Semi-Skimmed) (Half Fat - USA)
- 225 Grams Plain Flour - (All-Purpose Flour - USA)
- 1Teaspoon Baking Powder
Tip: Place the ingredients on the counter in the order you will use them; that way, you will remember to add everything in.Stock/Simple Syrup (Optional)
- 100 Grams Granulated Sugar
- 150 ml Water
- Spatula
- Small Pan/Hob
Tip - If you wish to make the stock/simple syrup for the cake, make this first. Do this by putting the sugar and water in a small pan, place on the hob and heat until all the sugar dissolves. Then place to one side and allow to cool. You do not need all the stock/simple syrup for the cake and there will be plenty left over. For a full guide, storage and additional info regarding stock/simple syrup, please see the below.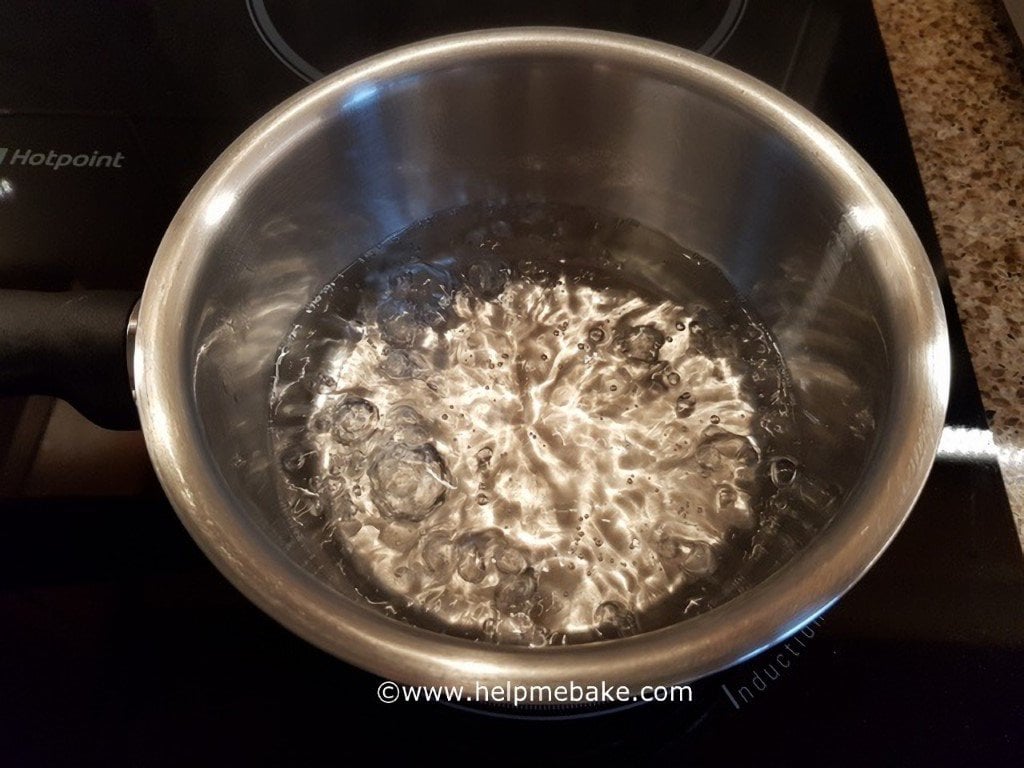
Stock Syrup Recipe and Guide
If you want to add extra moisture to your cakes, then you can do so by creating a stock/simple syrup. Here is a recipe and guide on how to make stock syrup for your pre-baked cakes. To make the stock syrup, you will need the following: Ingredients: 100 grams or 3.5 oz Granulated or Caster...www.helpmebake.com
Equipment:
- Mixing Bowl
- Small Bowl/Glass (For Cracking your Eggs Into)
- Scales
- Electric Hand Whisk
- Measuring Spoons
- Spatula
- Baking Paper/String
- Greasing Agent - Bake Easy or Cake Release
Tip: Cut out the required baking paper: You will need a circle for the base and a large strip to cover the exterior of the tin. It is always best to pre-cut these that way; when you're ready to pour, you can grease the tin, place the base-lining sheet in the bottom, pour the mix and then finish off by surrounding the tin with baking paper to give you a more even rise. Please note that a Madeira cake should crack on the top when baked.Method:
1. Weigh the soft margarine and caster sugar and place them in your mixing bowl.
2. Break 3 large eggs into a separate small bowl and then tip them into the mixing bowl. (This is to prevent any shell from entering your mix).
3. Weigh out the flour and then sift that along with the baking powder into your mix.
4. Add 2 tablespoons of milk.
5. Combine the ingredients together using a hand whisk on full power. It should only take about a minute or so to combine/thicken; you may want to scrape down the sides of the bowl and then whisk a tiny bit more.
6. Ensure there are no flour pockets in the mixture.
7. Pour the mix into a pre-lined greased tin and surround it with baking paper. Secure with a piece of string to hold the paper in place.
8. Bake on the middle shelf for regular ovens or on the lower bottom shelf (if you have a large-capacity oven like me). I baked mine on Shelf 1. Tip: For best results, please check your oven manual and see which shelf is best suited for your cakes.
9. Bake for approximately 1hr 15 mins. I checked mine at 1 hr 10 mins and then put it back in again for 4 mins.
10. Once baked, the cake should appear cracked on the top. To ensure it's fully baked, insert a skewer into the centre of the cake. If it comes out clean, it is done. If the skewer comes out gooey, place it back in the oven for 5 minutes. Continue with the skewer process using 5 - minute increments until the skewer is clean. If you don't want to add any stock syrup, go to Step 11.
Optional - * I add some stock syrup here.To do this, poke some holes in the top of the cake with the skewer.Then take a few spoonfuls of the stock/simple syrup and pour them over the holes you made in the cake. They will absorb into the hot cake.I then cover the cake with a food net/dome whilst still in the tin and leave for 10 mins. Now go to Step 12.
11. Once fully baked, place on a wire rack for approximately 10 minutes allowing the cake to shrink away from the sides. I placed mine on a damp tea towel to aid the tin cooling/contraction process. (Remove the exterior baking paper and string).
12. After 10 minutes, turn out onto a wire rack and peel off the base lining. * I then add a little more stock syrup to the base of the cake here. (Optional)
13. Allow the cake to fully cool. You can place the food net/dome back on here if you have one. Or leave the cake to cool as is. This can take up to 3 hours.
14. Once fully cooled, wrap in baking paper and cling film and leave to 'rest' for 24 hours.
Note: * I add stock syrup to the cake while it's hot so that it can absorb into the cake and dry out while the cake is cooling. This prolongs the life of the cake and retains moisture giving you a wonderfully moist cake.

Hi @Sonia p
As long as the cake is cold to the touch especially when you cut into it you can buttercream it, the only thing you'll have is more crumbs as the cake hasn't had time to settle properly. I leave mine to rest for 24 hrs so it has time to firm up a bit. If it's still warm the buttercream will melt.
If you are only filling the centre then use a piping bag to add the buttercream so you're not dragging crumbs around when spreading the buttercream about. If you're buttercreaming the outside do a crumb coat first put in the fridge and then add more buttercream in stages.
Hope this helps, good luck with the cake.
Thank you so much! It's not long out of the oven so I'm going to leave it at least 4 hours before doing a crumb coat and popping buttercream on. Would chilling it dry the sponge out at all? Or I could buttercream tomorrow but would that need time to set before the party at 1Hi @Sonia p
As long as the cake is cold to the touch especially when you cut into it you can buttercream it, the only thing you'll have is more crumbs as the cake hasn't had time to settle properly. I leave mine to rest for 24 hrs so it has time to firm up a bit. If it's still warm the buttercream will melt.
If you are only filling the centre then use a piping bag to add the buttercream so you're not dragging crumbs around when spreading the buttercream about. If you're buttercreaming the outside do a crumb coat first put in the fridge and then add more buttercream in stages.
Hope this helps, good luck with the cake.

 why do I put myself in these situations
 @Sonia p If it's a 6 x 3, you should be good after about 3 hours. When setting up the crumb coat, you wouldn't chill it for that long only to let the buttercream set so you won't dry it out. After that, you can apply the rest of the coats, but you don't have to put it in the fridge as long as the cake is in a cool/dry place, not next to your heating. Either that or get up early doors tomorrow and then buttercream it.
So decision time, you can either faff with more crumbs today, or wait patiently for the buttercream to set tomorrow. Do whatever works best for you and is less stressful. If you have any fillings in the cake or in the buttercream that are perishable then you'll have to chill it but you don't have to if using just butter/icing sugar buttercream.
So decision time, you can either faff with more crumbs today, or wait patiently for the buttercream to set tomorrow. Do whatever works best for you and is less stressful. If you have any fillings in the cake or in the buttercream that are perishable then you'll have to chill it but you don't have to if using just butter/icing sugar buttercream.
Thank you so much! It's not long out of the oven so I'm going to leave it at least 4 hours before doing a crumb coat and popping buttercream on. Would chilling it dry the sponge out at all? Or I could buttercream tomorrow but would that need time to set before the party at 1
How did you get on?

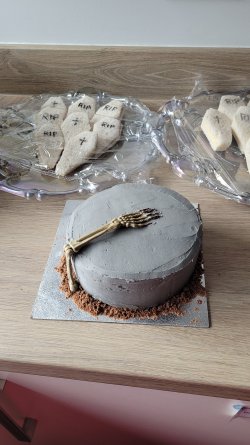
I think it looks authentic, like the hand has been moving/stroking the cake. Did you use a palette knife to do the buttercream? It looks like there are drag marks on it, so you actually needed a touch more buttercream adding to the cake to give you a smoother edge. But in all honesty, I think that would detract from the spookiness of the cake. The roughness gives it that edge because all Halloween stuff is rough-ready and rustic, so I think it's fabulous just the way it is.
There are a few tricks with buttercream you can do if you can't get a smooth edge: get a teaspoon and draw lines on the edge of the buttercream vertically. Run your palette knife around the edge to create grooves, or throw some more crumbs up the side of it. Although for your overall look, I'm not sure if either of those patterns would have looked good. A cake scraper/smoother will help give you a smoother finish going forward if you want to do another one.
In all honesty, I love your overall look, and considering everything was last minute, you did a grand job of pulling it off.
Awww you're too nice!! 
Yes, I used a pallet knife then tried (unsuccessfully) to use a smoother thingy but it was a cheap plastic one so maybe I need to invest in a metal one. I've also heard that it's best not to add milk to buttercream. Whoops. Maybe that made it harder to smooth? Plus my electric whisk broke during making the buttercream ( a few minutes after my husband asked how long we had had it - typical) so no baking for me for the moment. Thanks so much for all your help as alwayss 
Yes, I used a pallet knife then tried (unsuccessfully)
to use a smoother thingy but it was a cheap plastic one so maybe I need to invest in a metal one. I've also heard that it's best not to add milk to buttercream. Whoops. Maybe that made it harder to smooth? Plus my electric whisk broke during making the buttercream ( a few minutes after my husband asked how long we had had it - typical) so no baking for me for the moment. Thanks so much for all your help as alwayss Aww, you do make me laugh; sounds like me when I'm in the kitchen, I either can't find what I need, or something has a mind of its own, and then you have to improvise!
As for the buttercream, I always add milk to my buttercream to soften it; this makes it much easier to spread with a palette knife. If I don't, I can sometimes find that the buttercream is too dry to handle and can actually drag across the cake. I used to use my hand mixer for mixing buttercream but found that my stand mixer takes out of the hard work and makes it a beautiful, soft, silky texture. I generally mix everything else by hand, though, so I can feel the batter.
Yeah, as for the scraper, try a metal one; it will be more robust and probably give you the sharper edge that you're looking for and thanks for letting me know how you got on.
Similar threads
- Replies
- 0
- Views
- 4K
- Replies
- 0
- Views
- 10K
- Replies
- 2
- Views
- 34
- Replies
- 4
- Views
- 32K
Users who are viewing this thread
Total: 2 (members: 0, guests: 2)