Seeing as it's the season for sowing sunflower seeds (say that fast, lol), I thought it would be a good idea to make the edible kind for you to have a go at.
These bright, jolly flowers are something that have eluded me when making the plant kind, so I thought it best to make some edible ones instead.
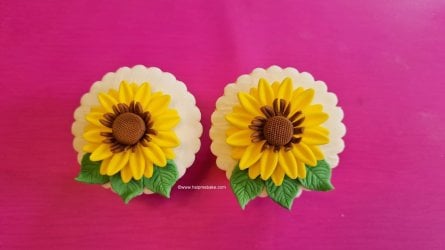
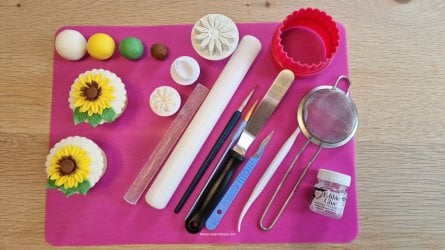
As you can see, you only need three colours, that's even if you want to include the background and leaves. You will also need a couple of tools and cutters too. They are a fun project to make with the kids and bring joy and happiness to all who make or receive them.
Throughout the tutorial, I'll offer additional options or variations for you to consider, or you can simply stick to the easiest version if you prefer. So enough of the chit-chat; here's how to make Easy Sunflower Cupcake Toppers.
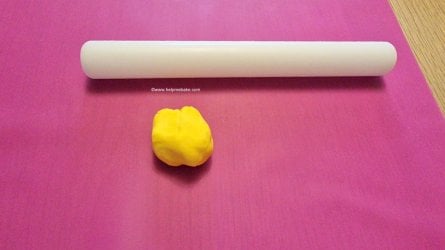
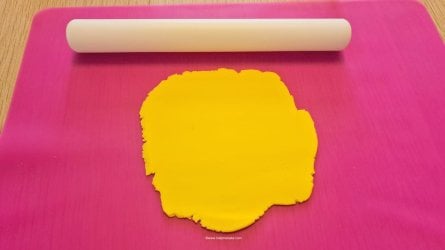
2 Roll it out to about 2-3mm thick.
3 Take the sunflower cutter and push it into the icing/fondant.
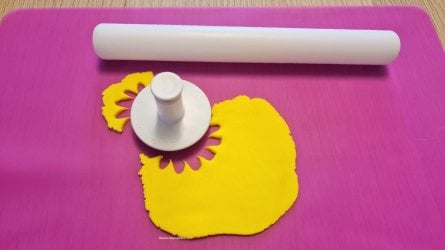
4 Move the cutter from side to side to tear the icing and release the cutter. Run your finger over the cutter/icing to remove any excess or scraggy pieces of icing.
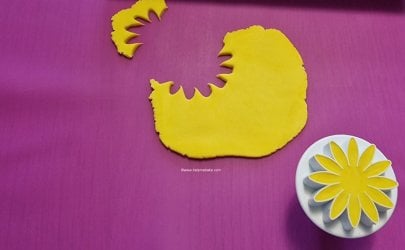
5 Press the push cutter onto the flower foam board/small sponge or your silicone mat, and the icing should drop straight out.
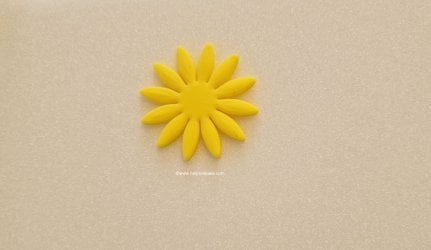
6 Take the Dresden Tool and indent the petals. The foam board is a harder surface so it's easier to indent the petals. If you don't have a foam board, you can use a silicone mat or a small sponge.
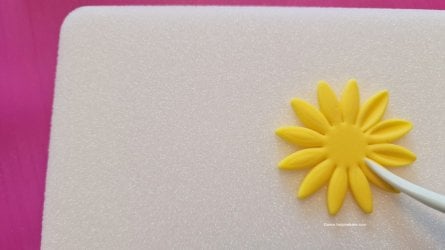
7 Once you have indented all the petals, squeeze the edges of each petal if you wish to. This gives the flower more definition.
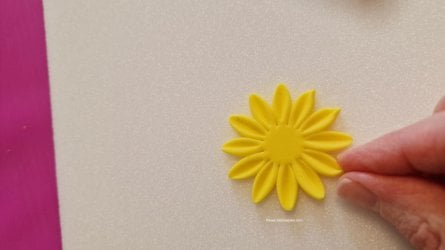
8 Repeat the above process for the second flower layer.
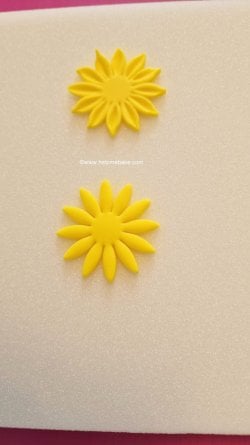
9 Once you're done, the Sunflower cutouts will look like this.
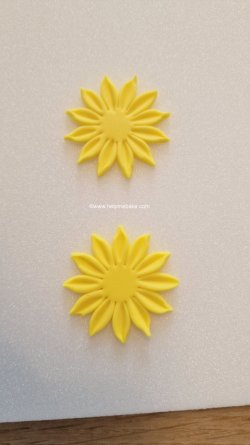
10 Scoop one of them up using your palette knife or butter knife.
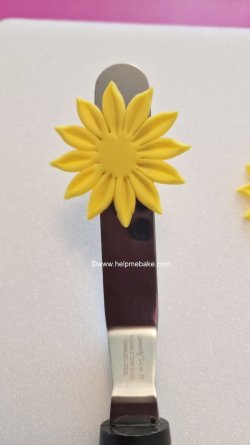
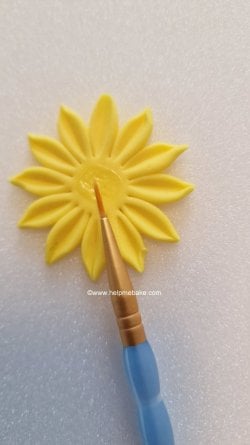
11 Take a small bit of edible glue or water and put it in the centre of the other flower using a small thin paintbrush.
12 Use the palette knife/butter knife to help position your flowers on top of one another.
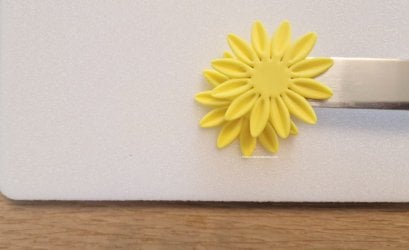
13 You want to ensure that you when you overlap the flowers.
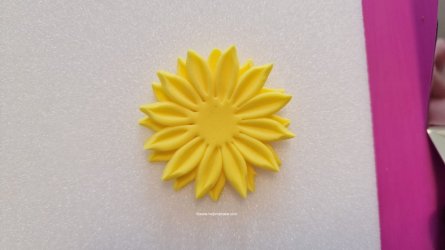
You can see both sets of petals like so.
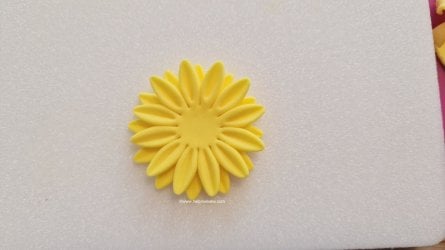
14 Then roll out a small piece of dark growing icing/fondant.
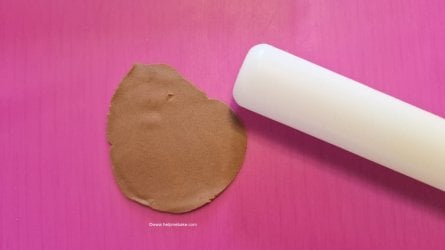
15 Push the daisy cutter into the icing, move the cutter from side to side and then lift and remove the cutter from the icing.
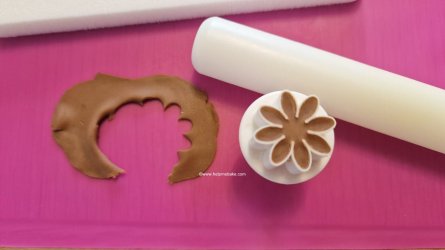
16 The daisy cutter will make a small daisy flower. If you don't have a daisy cutter, then a small circle cutter will also work.
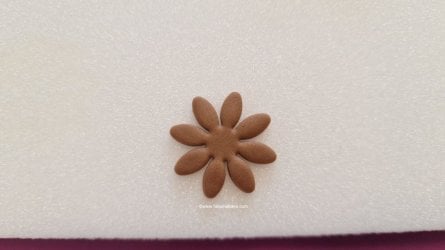
17 Using a sharp knife, slice small lines into the daisy petals.
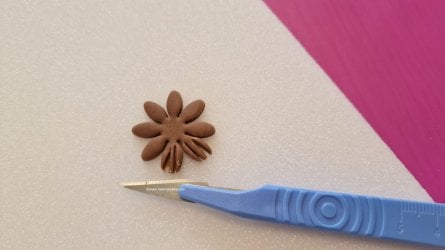
18 Do this to each petal of the daisy.
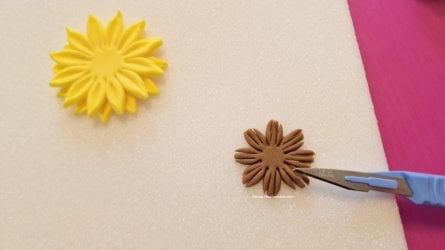
19 Once done, place a small amount of glue in the centre of the sunflower.
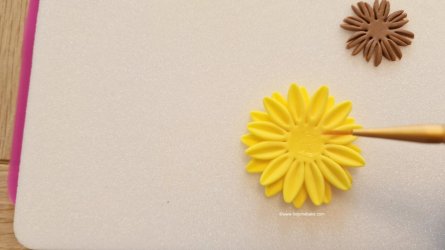
20 Using the palette knife.
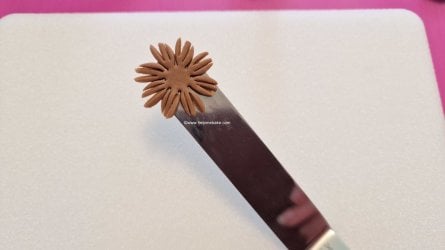
Place the sliced daisy in the centre of the sunflower.
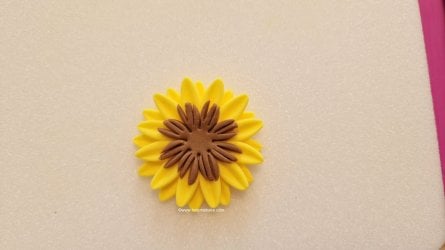
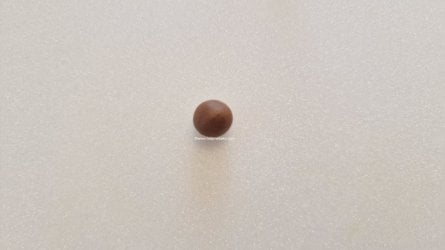
20 Then roll a small amount of brown icing into a small ball.
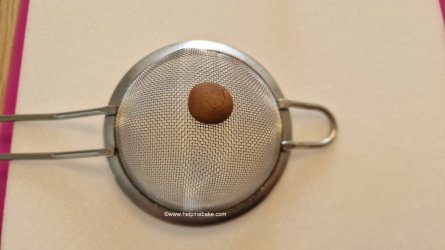
21 Place it on top of the sieve.
22 Lightly push the icing into the sieve.
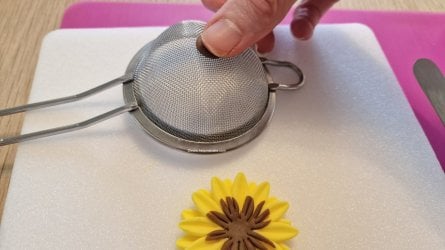
23 This will indent the icing and look like the seed section of the sunflower.
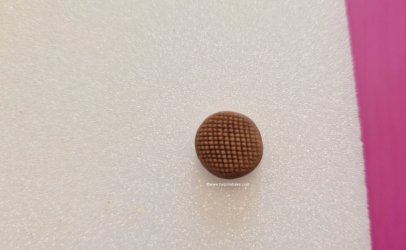
24 Then take a small amount of glue and place it in the centre of the flower.
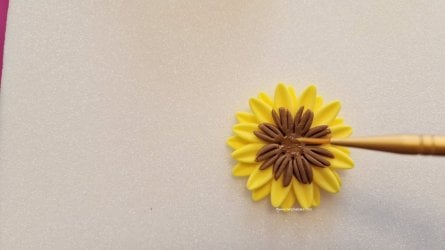
25 Stick the seed section in the centre of the flower like so.
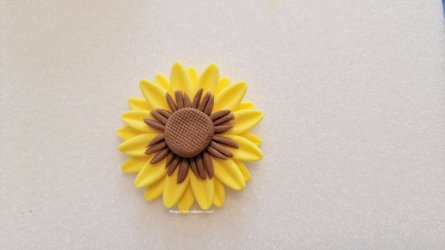
26 Then place a very small amount of glue around the edge of the seed section.
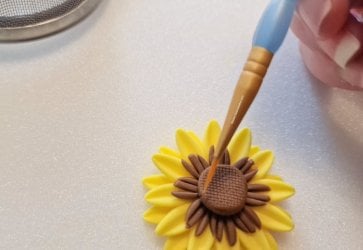
27 Then take your other clean paintbrush and lightly lift the edges of the cut daisy.
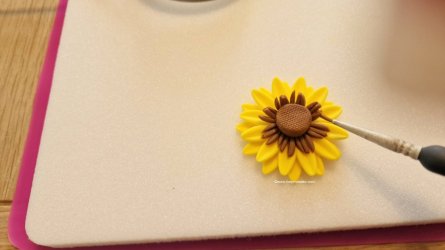
28 These will stick to the rim of the seed section and give the flower more definition.
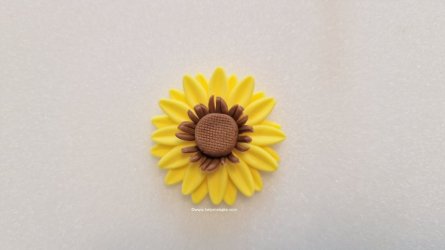
29 This leaf part is optional. Roll out a small amount of green icing 2-3mm thick.
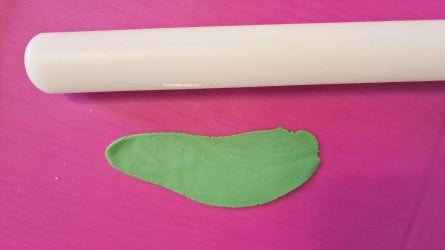
30 Using the leaf cutter, insert the cutter into the icing push down on the outer edge of the cutter then press the push part down to indent the icing with the leaf pattern.
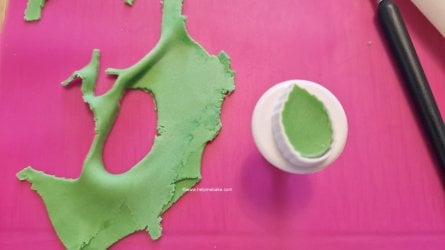
31 Then push the spring to release the leaf from the cutter.
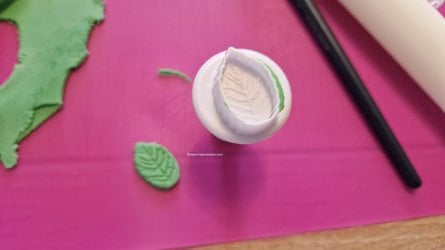
32 Make three more leaves.
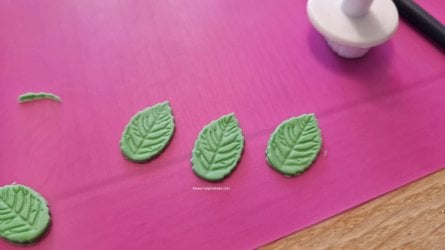
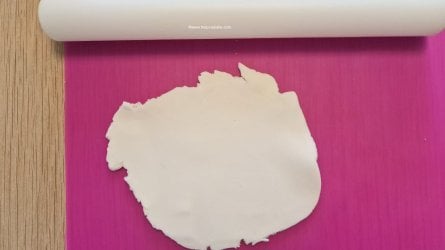
33 Again, this part is optional, as you could place the sunflowers in piped buttercream if you prefer. Roll out some white icing.
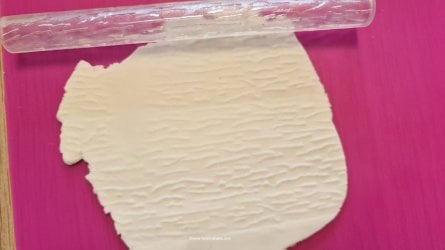
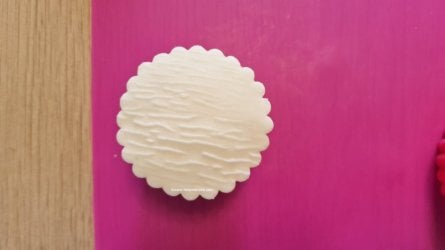
34 I used a patterned roller to give the icing a little texture.
35 Use the circle pastry cutter to cut out a fluted-edged circle.
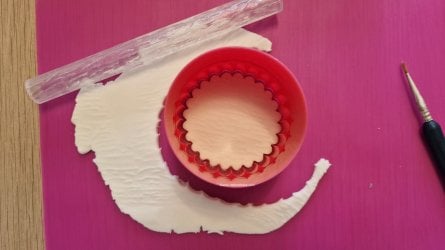
36 This can be placed on your cupcake and stuck with either jam/buttercream or frosting of your choice. I used a dummy, so I used a touch of glue.
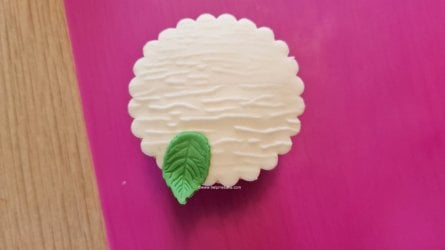
37 Stick one of the leaves at the bottom of the cupcake using either water or edible glue. If you want, squeeze the end of the leaf with your thumb and index finger and bend the leaf slightly so it looks like it has a little movement.
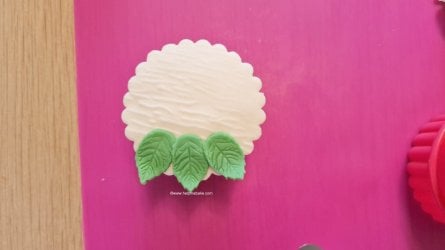
38 Stick the remaining leaves next to each other.
39 Place another small amount of glue in the centre of the white icing and stick the sunflower to it.
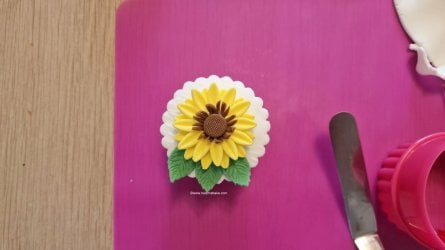
40 And there you have it Easy Sunflower Toppers.

I do hope you have a go at these cheerful flowers, especially with all this rainy weather we're having at the minute. Remember to take pictures of them if you and the kids do have a go and post them if you wish.
No matter what you do, enjoy and happy making!
These bright, jolly flowers are something that have eluded me when making the plant kind, so I thought it best to make some edible ones instead.

As you can see, you only need three colours, that's even if you want to include the background and leaves. You will also need a couple of tools and cutters too. They are a fun project to make with the kids and bring joy and happiness to all who make or receive them.
Throughout the tutorial, I'll offer additional options or variations for you to consider, or you can simply stick to the easiest version if you prefer. So enough of the chit-chat; here's how to make Easy Sunflower Cupcake Toppers.
Equipment:

- 6.5 cm Circle Pastry Cutter - (Measure against the size of the Cupcake)
- 4.5 cm Sunflower Cutter
- 2.5 cm Daisy Cutter/Circle Cutter
- 2.5 cm Leaf Cutter - Optional
- Silicone Mat
- Sharp Knife
- Palette Knife/Butter Knife
- Small Rolling Pin
- Sieve
- Edible Glue/Water
- 2 x Small Thin Paintbrushes
- Dresden Tool
- Flower Foam Pad/Small Sponge
Icing Fondant:
- Yellow Icing
- Dark Brown Icing
- Green Icing - Optional
- White Icing - Optional
Note:
If making these toppers as gifts, please use food gloves for hygiene purposes. I have not used food gloves in the photos, as this tutorial is for illustration purposes only.Method:
1 Take a small ball of yellow icing fondant.
2 Roll it out to about 2-3mm thick.

3 Take the sunflower cutter and push it into the icing/fondant.

4 Move the cutter from side to side to tear the icing and release the cutter. Run your finger over the cutter/icing to remove any excess or scraggy pieces of icing.

5 Press the push cutter onto the flower foam board/small sponge or your silicone mat, and the icing should drop straight out.

6 Take the Dresden Tool and indent the petals. The foam board is a harder surface so it's easier to indent the petals. If you don't have a foam board, you can use a silicone mat or a small sponge.

7 Once you have indented all the petals, squeeze the edges of each petal if you wish to. This gives the flower more definition.

8 Repeat the above process for the second flower layer.

9 Once you're done, the Sunflower cutouts will look like this.

10 Scoop one of them up using your palette knife or butter knife.

11 Take a small bit of edible glue or water and put it in the centre of the other flower using a small thin paintbrush.

12 Use the palette knife/butter knife to help position your flowers on top of one another.

13 You want to ensure that you when you overlap the flowers.

You can see both sets of petals like so.

14 Then roll out a small piece of dark growing icing/fondant.

15 Push the daisy cutter into the icing, move the cutter from side to side and then lift and remove the cutter from the icing.

16 The daisy cutter will make a small daisy flower. If you don't have a daisy cutter, then a small circle cutter will also work.

17 Using a sharp knife, slice small lines into the daisy petals.

18 Do this to each petal of the daisy.

19 Once done, place a small amount of glue in the centre of the sunflower.

20 Using the palette knife.

Place the sliced daisy in the centre of the sunflower.

20 Then roll a small amount of brown icing into a small ball.

21 Place it on top of the sieve.

22 Lightly push the icing into the sieve.

23 This will indent the icing and look like the seed section of the sunflower.

24 Then take a small amount of glue and place it in the centre of the flower.

25 Stick the seed section in the centre of the flower like so.

26 Then place a very small amount of glue around the edge of the seed section.

27 Then take your other clean paintbrush and lightly lift the edges of the cut daisy.

28 These will stick to the rim of the seed section and give the flower more definition.

29 This leaf part is optional. Roll out a small amount of green icing 2-3mm thick.

30 Using the leaf cutter, insert the cutter into the icing push down on the outer edge of the cutter then press the push part down to indent the icing with the leaf pattern.

31 Then push the spring to release the leaf from the cutter.

32 Make three more leaves.

33 Again, this part is optional, as you could place the sunflowers in piped buttercream if you prefer. Roll out some white icing.

34 I used a patterned roller to give the icing a little texture.

35 Use the circle pastry cutter to cut out a fluted-edged circle.

36 This can be placed on your cupcake and stuck with either jam/buttercream or frosting of your choice. I used a dummy, so I used a touch of glue.

37 Stick one of the leaves at the bottom of the cupcake using either water or edible glue. If you want, squeeze the end of the leaf with your thumb and index finger and bend the leaf slightly so it looks like it has a little movement.

38 Stick the remaining leaves next to each other.

39 Place another small amount of glue in the centre of the white icing and stick the sunflower to it.

40 And there you have it Easy Sunflower Toppers.

I do hope you have a go at these cheerful flowers, especially with all this rainy weather we're having at the minute. Remember to take pictures of them if you and the kids do have a go and post them if you wish.
No matter what you do, enjoy and happy making!
