Here is your step by step guide to producing cute cake pops.

Preheat the oven to one of the following:
Fan assisted: 180°C
Regular Oven: 190-200°C
Fahrenheit: 356F
Gas Mark 4.
Ingredients:
100 grams / 3.5oz butter or margarine
100 grams / 3.5 oz sugar (I used granulated sugar)
2 Medium Eggs
100 grams / 3.5 oz flour
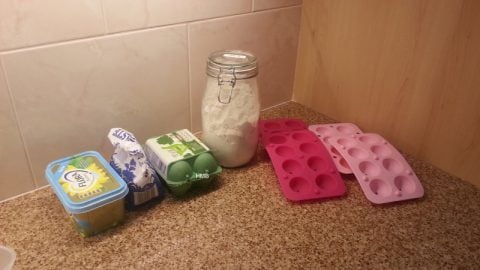
Decorate:
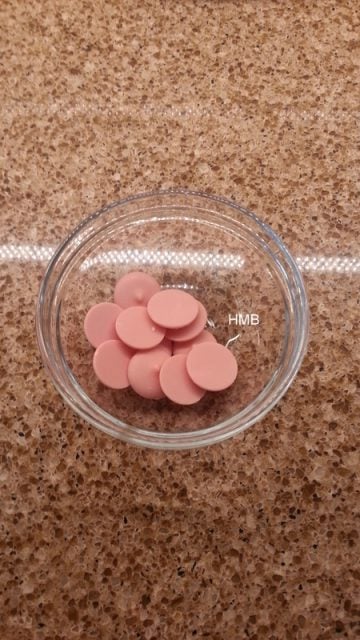
A bag of candy buttons/melts 340 grams.
Or approx 200 grams of milk chocolate baking chocolate to cover.
Sprinkles/Popping Candy/Hundreds and Thousands

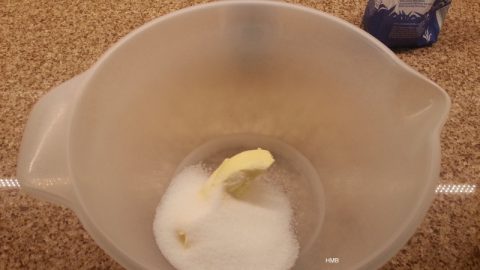
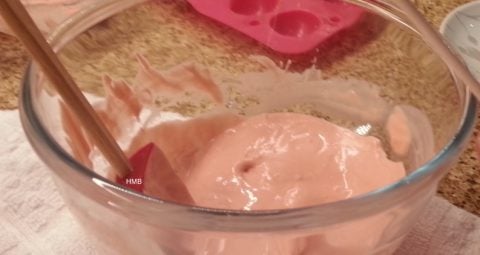
1. Weigh out your butter and sugar and place them into a mixing bowl.
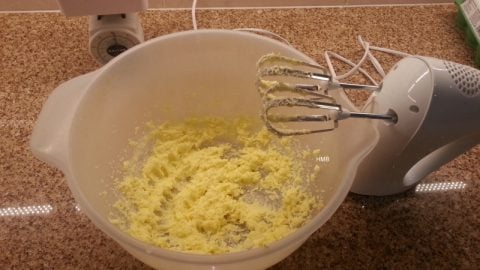
2. Cream the butter and sugar together with a whisk. Whisk for approx 45-60 seconds.
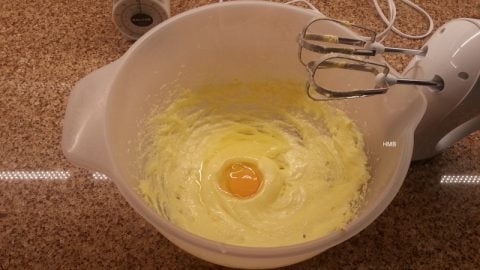
3. Once combined, then crack an egg into a small bowl and then pour into your mixing bowl.

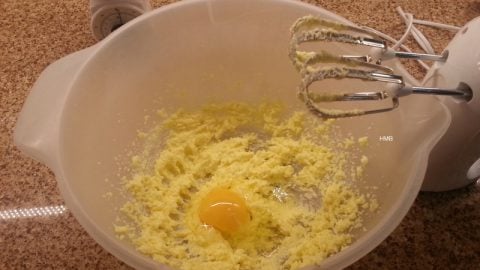
4. Whisk the egg into your mix; once this has mixed, add your second egg and repeat the process.
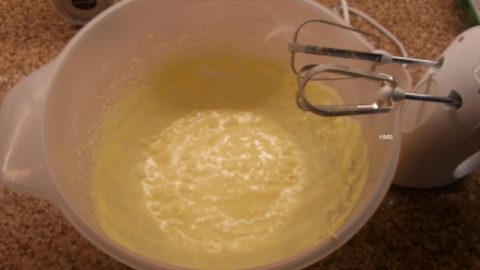
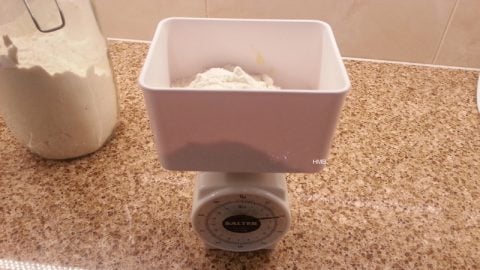
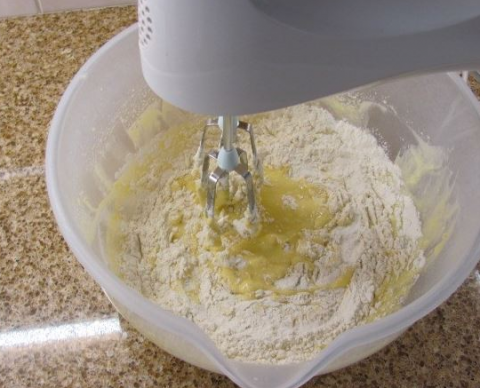
5. Once the eggs have been mixed in, weigh out your flour and then add to your mixing bowl (you may sieve it into your mixing bowl if you wish to add more air).
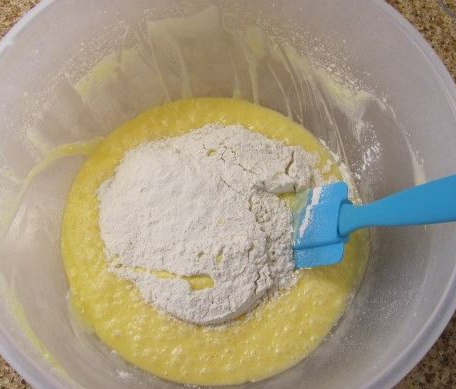
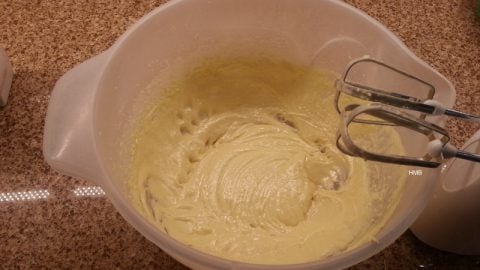
6. Use your whisk (whilst switched off ) to stir some of the flour into your mix manually; this prevents it from firing up and throwing flour onto your work surface. Once it is slightly mixed in, then put your whisk on full speed and mix in.
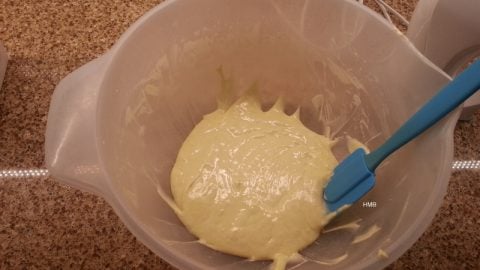
7. Once mixed in, scrape down the sides of your bowl using a spatula and blast for an extra 10 seconds with your whisk.
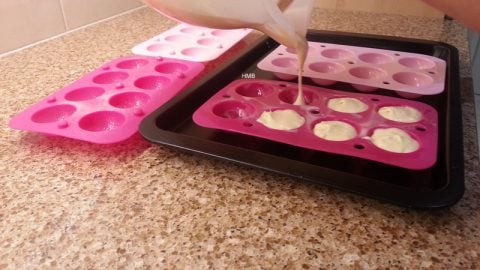
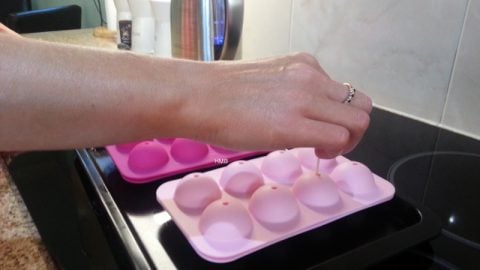
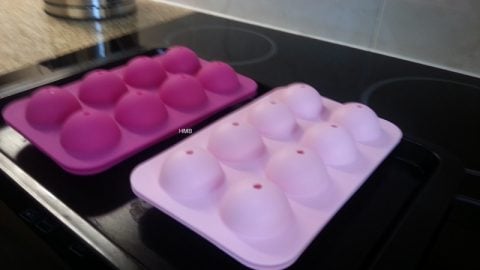
8. Now, pre grease your cake pop moulds top and bottom using oil or cake release and place them on a baking tray.
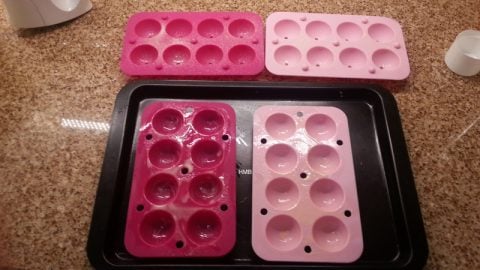
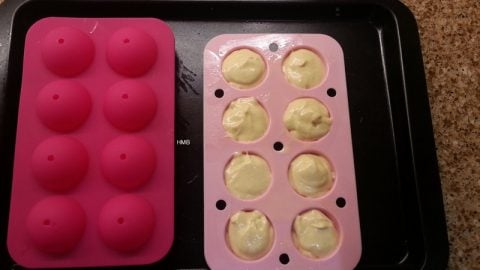
9. Then you can add the cake mix.
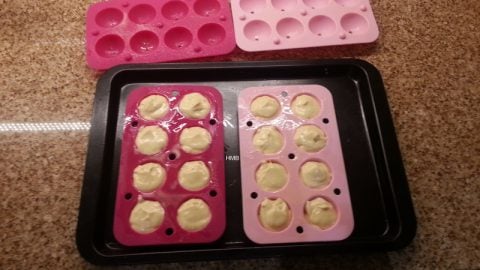
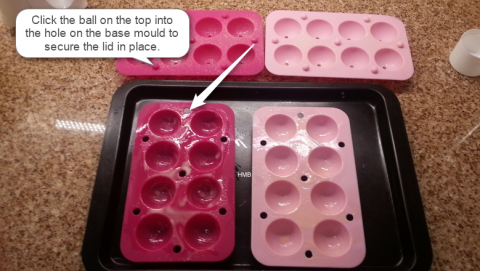
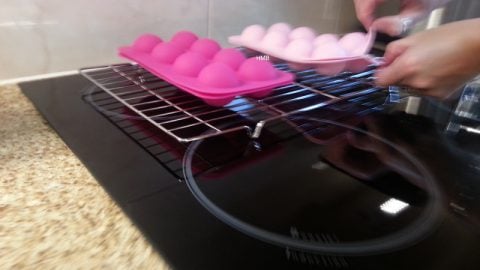
10. Place and secure the lids on the top by clicking the balls on the outer edge of the top mould into the holes of the base mould. That's the way they clip together.
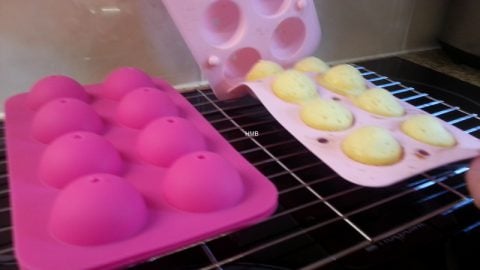
11. Then place them on the middle shelf of the oven and bake for approx 12-14 mins depending on your oven.
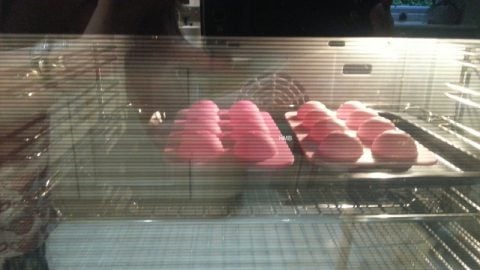
12. Once baked, remove from the oven and test to see if they are cooked by inserting a cocktail stick into each hole. If the stick comes out clean, they are done.
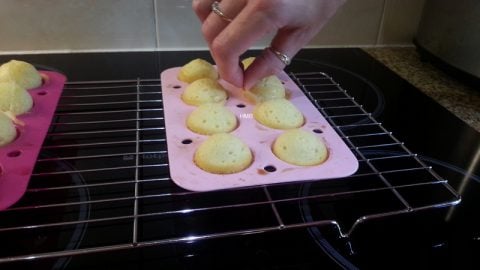
13. Now, lift the moulds carefully and place them on a wire rack. BE CAREFUL THEY WILL BE HOT, also remove the lid of each mould very carefully to allow the cake pops to cool slightly.
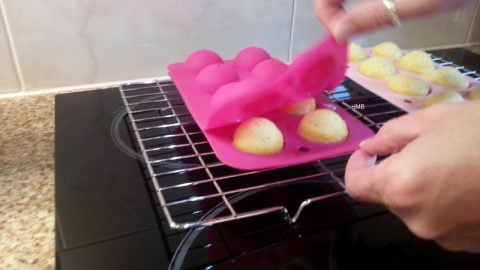
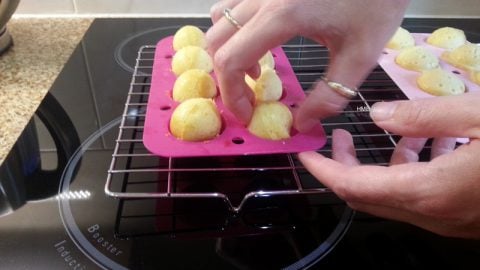
14. Leave to cool for a minute, then rotate the pops over so that the base can now be aired and cooled; this will ensure they are not soggy. You may also peel any extra cake bits off the pops at this point so that the shape of them is round.
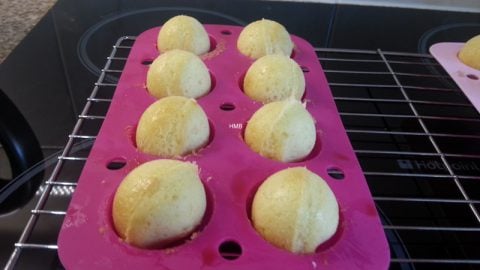
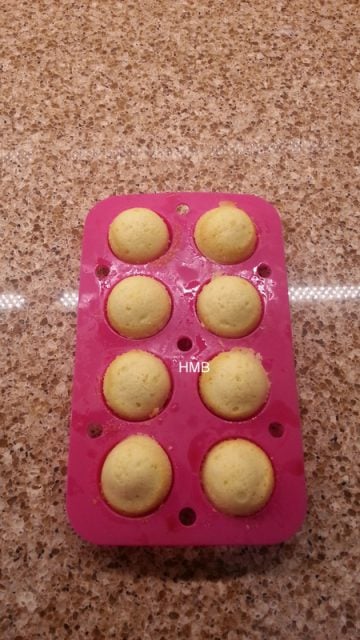
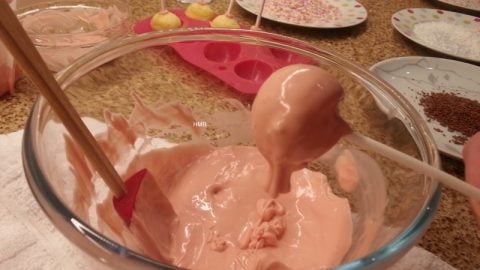
15. Once fully cooled (this should take about 10-15 mins), you can now decorate them.
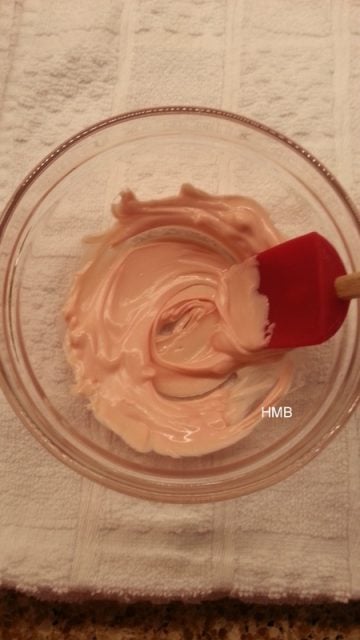
Take a batch of cake pops and get a hand full of candy melts or a few blocks of baking chocolate and melt it in the microwave in 30-second intervals.
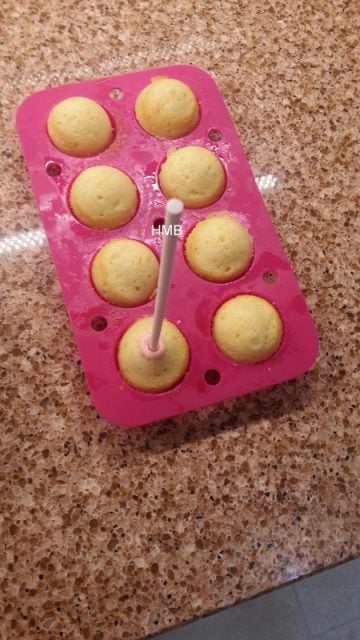
16. Take a cake pop stick and insert it into the melted candy melt or chocolate-like so.

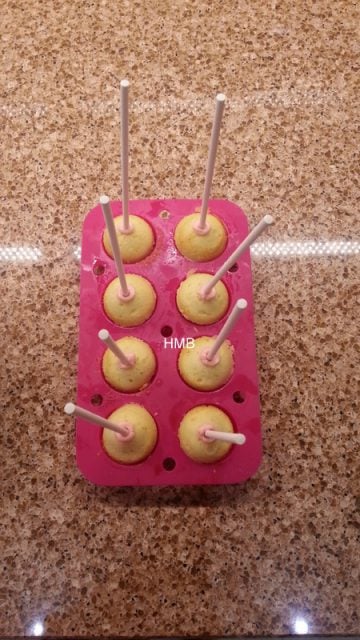
17. Now insert it in your cake pop, repeat the process until all your cake pops have lollipop sticks in them.
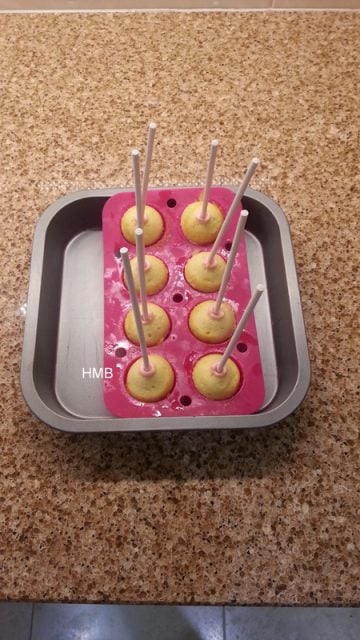
18. I then placed the mould into a tin for support and placed them in the fridge to set. This will make sure that the cake pop and stick bind together. Please leave them in the fridge for approx ten minutes. This gives you a chance to make yourself a quick cup of tea while you're waiting!
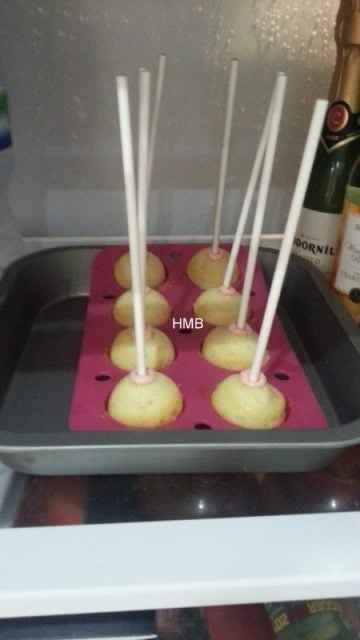
19. After approx 10 mins, remove the pops from the fridge and lift the cake pop out of the mould by the stick end; make sure that it is secure and not sliding down the lollipop stick.
20. Now, take a large glass bowl and melt some more candy melts (I just used a large handful of candy buttons) or use chocolate (about 100 grams depending on how many you are making); place in a bowl and then put in the microwave in 30-second intervals until it is melted.
Tip: Melt your button melts or chocolate amounts in stages; that way, if you run out, you can always melt some more. If you melt it all at once, you run the risk of having to rush through your cake pops to get them covered in time before the button melts or chocolate harden.
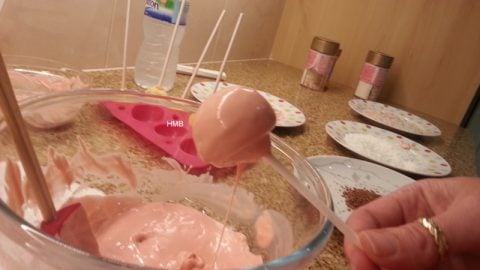
21. Take one of your cake pops, dip the pop into the bowl, and swirl around until it is fully covered. The excess melts or chocolate will drip off your cake pop. Hold the cake pop at an angle against your bowl and swirl the stick in your fingers; this will assist with the dripping process and get the excess melt or chocolate off quicker.
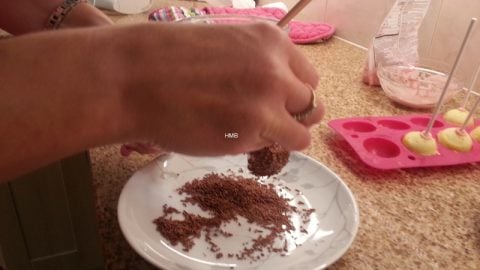
22. Lightly tap the lollipop stick against your bowl to get the final drips off; when you are happy, all the excess has dripped off, insert your pop into your sprinkles. If you just wish to cover the top, then put the cake pop directly into the sprinkles like so.
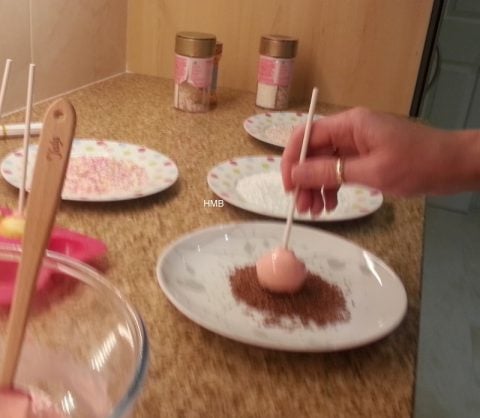
23. If you wish to cover the edges, then sprinkle the sprinkles over your cake, pop using your fingers and rotate the cake pop until fully covered. I used chocolate sprinkles, popping candy and hundreds and thousands to decorate my pops.
24. Now, place the cake pop into some polystyrene or oasis and place it in the fridge to set. Do this with each pop until all covered, leaving the cake pops and polystyrene in the fridge and just inserting a new one each time you do it.
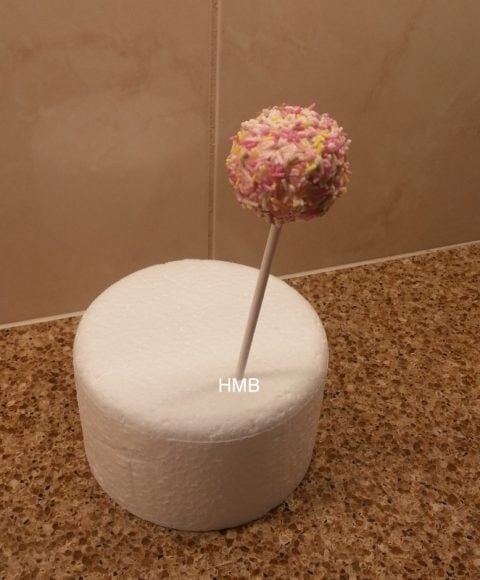
25. Then leave in the fridge for about 10 mins or longer until fully set. These can be wrapped individually or placed in a cake pop box.
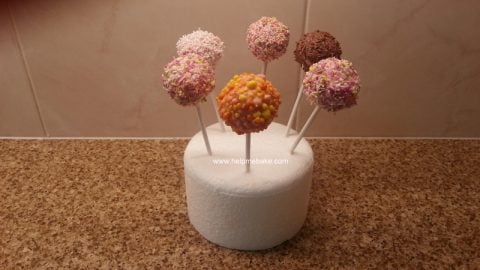

Here are other cake pops I have made...these were dipped in chocolate and then dipped in sprinkles.
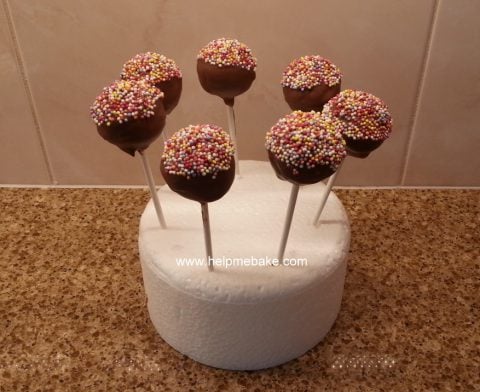
Tip: Candy Melts set quicker and are less messy, but the chocolate covered ones taste better, in my opinion.
Preheat the oven to one of the following:
Fan assisted: 180°C
Regular Oven: 190-200°C
Fahrenheit: 356F
Gas Mark 4.
Ingredients:
100 grams / 3.5oz butter or margarine
100 grams / 3.5 oz sugar (I used granulated sugar)
2 Medium Eggs
100 grams / 3.5 oz flour
Decorate:
A bag of candy buttons/melts 340 grams.
Or approx 200 grams of milk chocolate baking chocolate to cover.
Sprinkles/Popping Candy/Hundreds and Thousands
1. Weigh out your butter and sugar and place them into a mixing bowl.
2. Cream the butter and sugar together with a whisk. Whisk for approx 45-60 seconds.
3. Once combined, then crack an egg into a small bowl and then pour into your mixing bowl.
4. Whisk the egg into your mix; once this has mixed, add your second egg and repeat the process.
5. Once the eggs have been mixed in, weigh out your flour and then add to your mixing bowl (you may sieve it into your mixing bowl if you wish to add more air).
6. Use your whisk (whilst switched off ) to stir some of the flour into your mix manually; this prevents it from firing up and throwing flour onto your work surface. Once it is slightly mixed in, then put your whisk on full speed and mix in.
7. Once mixed in, scrape down the sides of your bowl using a spatula and blast for an extra 10 seconds with your whisk.
8. Now, pre grease your cake pop moulds top and bottom using oil or cake release and place them on a baking tray.
9. Then you can add the cake mix.
10. Place and secure the lids on the top by clicking the balls on the outer edge of the top mould into the holes of the base mould. That's the way they clip together.
11. Then place them on the middle shelf of the oven and bake for approx 12-14 mins depending on your oven.
12. Once baked, remove from the oven and test to see if they are cooked by inserting a cocktail stick into each hole. If the stick comes out clean, they are done.
13. Now, lift the moulds carefully and place them on a wire rack. BE CAREFUL THEY WILL BE HOT, also remove the lid of each mould very carefully to allow the cake pops to cool slightly.
14. Leave to cool for a minute, then rotate the pops over so that the base can now be aired and cooled; this will ensure they are not soggy. You may also peel any extra cake bits off the pops at this point so that the shape of them is round.
15. Once fully cooled (this should take about 10-15 mins), you can now decorate them.
Take a batch of cake pops and get a hand full of candy melts or a few blocks of baking chocolate and melt it in the microwave in 30-second intervals.
16. Take a cake pop stick and insert it into the melted candy melt or chocolate-like so.
17. Now insert it in your cake pop, repeat the process until all your cake pops have lollipop sticks in them.
18. I then placed the mould into a tin for support and placed them in the fridge to set. This will make sure that the cake pop and stick bind together. Please leave them in the fridge for approx ten minutes. This gives you a chance to make yourself a quick cup of tea while you're waiting!
19. After approx 10 mins, remove the pops from the fridge and lift the cake pop out of the mould by the stick end; make sure that it is secure and not sliding down the lollipop stick.
20. Now, take a large glass bowl and melt some more candy melts (I just used a large handful of candy buttons) or use chocolate (about 100 grams depending on how many you are making); place in a bowl and then put in the microwave in 30-second intervals until it is melted.
Tip: Melt your button melts or chocolate amounts in stages; that way, if you run out, you can always melt some more. If you melt it all at once, you run the risk of having to rush through your cake pops to get them covered in time before the button melts or chocolate harden.
21. Take one of your cake pops, dip the pop into the bowl, and swirl around until it is fully covered. The excess melts or chocolate will drip off your cake pop. Hold the cake pop at an angle against your bowl and swirl the stick in your fingers; this will assist with the dripping process and get the excess melt or chocolate off quicker.
22. Lightly tap the lollipop stick against your bowl to get the final drips off; when you are happy, all the excess has dripped off, insert your pop into your sprinkles. If you just wish to cover the top, then put the cake pop directly into the sprinkles like so.
23. If you wish to cover the edges, then sprinkle the sprinkles over your cake, pop using your fingers and rotate the cake pop until fully covered. I used chocolate sprinkles, popping candy and hundreds and thousands to decorate my pops.
24. Now, place the cake pop into some polystyrene or oasis and place it in the fridge to set. Do this with each pop until all covered, leaving the cake pops and polystyrene in the fridge and just inserting a new one each time you do it.
25. Then leave in the fridge for about 10 mins or longer until fully set. These can be wrapped individually or placed in a cake pop box.
Here are other cake pops I have made...these were dipped in chocolate and then dipped in sprinkles.
Tip: Candy Melts set quicker and are less messy, but the chocolate covered ones taste better, in my opinion.
Last edited: