What's new

Springtime Bakes - Student Creations (1 Viewer)

Springtime Bakes - Standish - (Mar - Apr)

So we were back baking again last night with our new batch of ladies after the half term break. In tonight's lesson we had Renata and her daughter Shona and then we had Fran too. We were lucky to have Fran to be honest as she was banging on the reception door trying to get let in, it was only because somebody was leaving did she manage to gain entry at all.:)

After the initial introductions and form filling we finally cracked on with the baking side of things. This week we were making marbled sponge with a chocolate topping of your choice. I always choose Terry's chocolate orange as I find it compliments the cake and is a delicious treat with a cup of tea.
:p

I proceeded with the dem and gave the ladies hints & tips on how to do things and also the science behind the baking and why things do the things they do. I then went on to advise that I grease the tins beforehand using a product called Bake Easy. I greased one of the tins and poured my mix in and then forgot to grease my next tin and had to scrape it back in the bowl and start again. I was just about to make the same mistake again before the ladies corrected me. I advised them I was testing them to see if they had been listening to what I had been saying....obviously they had.
clear.png


Once the cakes were placed in the oven I advised them they could now start their own cakes. Renata's butter was a little cold to begin with and stuck to the whisk but after a lot of super whisking she had it ship shape and warmed up in no time at all.
clear.png
I then proceeded to made the ladies a brew to quench their thirst.

The ladies had great fun in the lesson, especially the taste testing which I always say is a must when baking. I also helped them out with a few helpful hints when storing and transferring baking although they assured me that their children would not let the baking sit for long and it would probably be devoured before it even had time to hit the fridge.

We had a great evening and I look forward to our bakes next week.

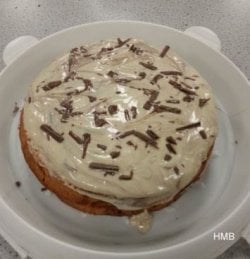
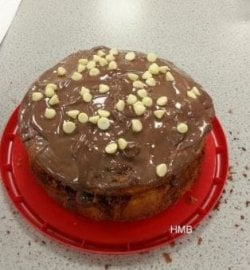
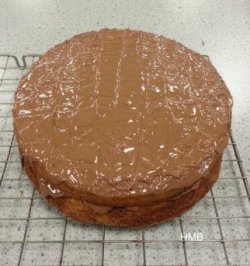
Here are there creations for week one of the course.....
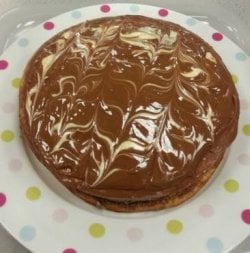
Springtime bake.JPG

Renata:
springtime bake2.JPG

Shona:
springtime bake3.JPG

Fran:
springtime bake4.JPG

We're looking forward to next week.
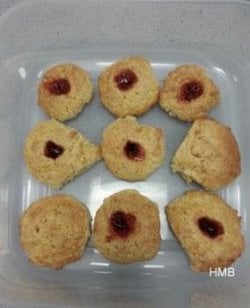
 
Well we had more baking bonazas on week 2 and a bit of a mishap too! Week 2's lesson was all about biscuits and buns which everyone was keen to have a go at. Gail managed to join us this week after missing out on week one due to family celebrations.

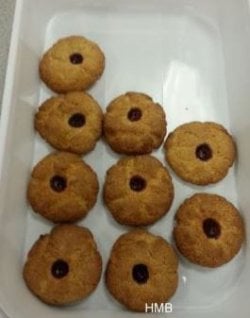
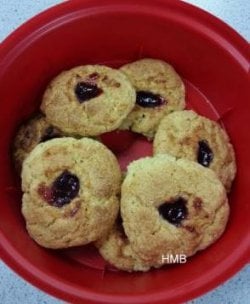
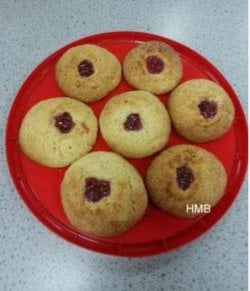
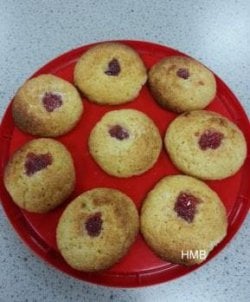
I started the lesson by showing the ladies how to make the raspberry buns. They are not a bun as such not like your regular fairy cake or cupcake but more leaning towards a scone type cake/biscuit they are slightly crunchy on the outside (not break your teeth crunchy) and then softer in the centre topped with a jam of your choice. I chose Strawberry jam as this is my favourite of the jams. I did a demo on how to make up the mix and then how to segment into ball shapes and then make a well for the jam. I also did an alternative version whereby you sealed the jam in the bun so there is a nice surprise when you bite into it. Fran also suggested that you could in fact double up and have them as at afternoon tea. I advised that was a great idea and you could fill them with cream too for extra naughtiness!
:p

Although the ladies are given the same brief all the buns came out differently, we had golden brown ones, crunchy ones to lovely little round ones. All of them looked delicious and the ladies were really pleased with their results. Now for the flapjack demo, it was at this point I advised the ladies they would need to reduce the oven temperature in order to bake the flapjacks correctly.

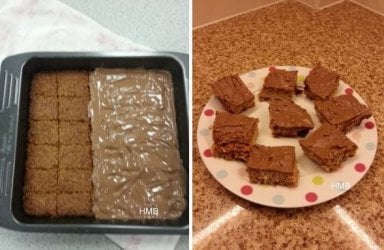
The ladies sat down with a brew (tea/coffee) as I proceeded to go through the stages of making flapjacks. I explained this was a delicious recipe and great for lunch box snacks too, some of the ladies got a little creative and wanted to put added nuts for extra flavour. The flapjacks are relatively easy to make and taste delicious. I informed the students that flapjacks actually hardened up after they have been removed from the oven so bake them for the actual cooking time/temp and no longer otherwise they will be hard.

The lesson seemed to be going well and everyone was busy prepping and baking ....that's when I could smell it I said I'm sure I can smell burning, so I hunt a little further, yep I can smell it but cannot see it. Unfortunately, it was then that I discovered I was correct, the oven door opens and yep there are plumes of steam and smoke emerging.....somebody had their oven on a little too high. I'm not going to mention any names but we did end up with some very burnt charcoal biscuits.
doh.gif


Not the look we were going for or the smell either especially for me when a bunch of potential customers are passing at that very moment that we are scraping burnt flapjacks off the tin...but hey these things happen and lessons learned, always check the temp! No harm done, just a quick empty of the bins at the end of lesson. It was a good job we were making two items this week otherwise they would have gone home empty handed.

Here are some of the pics from the lesson:.......they were delayed on posting to this thread hence Joans comment! Lol!

Angie:
springtime bake5.JPG

Gail:
springtimebake6.JPG

Fran:
springtimebake7.JPG

Renata:
springtime bake6.JPG

Shona:

springtime bake7.JPG
I do have a couple of the flapjack ones but mentioning no names of whose they are!

springtime bake8.JPG
 
Lol! I'm waiting to extract them off my phone, I have to email them to myself! You're too quick Joan!
 
Last edited:
Now to last night's lesson which consisted of Double Baked American Cheesecake and Viennese Whirls.

I wasn't sure whether we would actually have time for everything last night as we decided to run the cheesecake bake in three stages. Firstly we started off with the base.....so as I explained to the ladies if you've had a bad day and are in need of some stress relief then there's nothing more therapeutic than bashing digestive biscuits into oblivion with the aid of a rolling pin!
clear.png
. (I told you our lessons were relaxing!)

After we had all created the bases we then went on to make the first part of the cheesecake filling; as I discussed the elements of baking. With this particular bake we are not looking to add air to the mix as we do not want air bubbles and we must ensure that the eggs are added in slowly to prevent curdling. Although this mix seems a little thin and wet it does actually bulk up to to be very creamy and solid. The only thing we have to watch out for is soggy bottoms which can be a fault with no baked base cheesecakes. There are ways to prevent this such as pre baking the base, placing it into the fridge to set whilst baking. Brushing the base with egg white and baking and also adding a chocolate layer to the biscuit base although this is generally used for no bake cheesecakes. They could also add a few extra minutes of cooking time to ensure that the base and cake are done this can be determined by ensuring the cheesecake has a wobble when it comes out of the oven. If the cake looks like liquid I would rotate and place back in the oven for a few minutes to create an even bake and good wobble. The wobble factor is imperative!

Once we had gotten our wobbles sorted I then went on to quickly demo how to make Viennese biscuits and asked the ladies to assist with the piping part to test their piping skills out. They were actually very good at it and created some lovely shapes for me. I then gave them the extra handout and offered them advice and hints and tips of how they can make the biscuits at home and decorate them.

Back to the cheesecake....I also advised that on a normal baked cheesecake that if you wrap the tin and sides containing the cheesecake in tinfoil and place it in a steam bath whilst baking this will actually prevent cracking as will allowing the cheesecake to remain in the oven once baked with the door slightly ajar. Although with the cheesecake we are making that doesn't matter as we will be adding another layer to the top fro extra creaminess.

Once our cheesecakes had sat for 15 mins we then mixed up the last bit of the topping and poured the final cream onto the top, back in the oven again for 10 minutes and then we have our cheesecakes! They all turned out really well although I have yet to find out who's was best out of Shona's and Renata's as they mixed up their bases and ended up with each others!

I also let them get away without taking pictures!

Here are mine from the evening.....I need to get these on quickly before Joan comes back! LOL!


Last edited:
Better late than never, sorry I was too quick for you Angie but you certainly made up for it, they all look fantastic and very yummy.
 
Last edited by a moderator:
You made me giggle Joan and are keeping me on my toes so all's good! Thank you, the cheesecake is fabulous it's very rich and creamy, I'm the only person in our house who actually likes it, the Viennese were lovely too.
 
Oh well if you're the only who likes cheesecake you can send me the rest, unless you've already wolfed it down yourself.
 
Last edited by a moderator:
John's got his mate round and we were talking about cake, he has just informed me that he likes cheesecake and would have had some. (He's been in the fridge I don't know how many times). Joan I'd share a cheesecake with you anytime!
 
Last edited:
For our final week we made Carrot Cupcakes topped with edible decorations, Renata informed me that Carrot Cake is one of her favourite cakes of all time so no pressure on me there then! LOL!

As always I did a demonstration beforehand showing the ladies the different stages of the cake mix. There are a lot of ingredients for this cake but they are truly yummy when they have been baked, although you do have to ensure that the are baked properly as sometimes when the skewer comes out clean they can actually still be a little under baked in the middle due to the density and the amount of carrot that goes into the mixture.

After showing the demo the ladies got to grips making their own, Fran was telling us all about her Macmillan Cake morning that raised lots of money for Cancer. She said there was cake everywhere, it was for a great cause and everybody enjoyed the morning! I said that her new found baking skills would have come in handy for that! She also told us that as it was St Patrick's day she was going to leave early as she was going out with her Mum. I said that if she liked I would show her how to make a four leaf clover later on in the lesson to go on the top of her cupcake. She said her Mum would love that!

Once my cakes had cooled I removed them from the oven and then did the demonstration on the cream cheese frosting and then moved on to the edible carrots. We spoke about the different dyes that are available to use, how much to use and a few do's and don'ts when it comes to colours. I then showed the ladies how to make a four leaf clover, some edible icing carrot decorations and added affects that can be used in order to enhance the final cupcake.

The ladies didn't all have time to finish if the decorations but did manage to finish then when they got home. They sent me the pics of their final results.

We have had a great time on this course and I look forward to teaching them again soon.

Here are there cakes.....


Users who are viewing this thread

Back
Top