
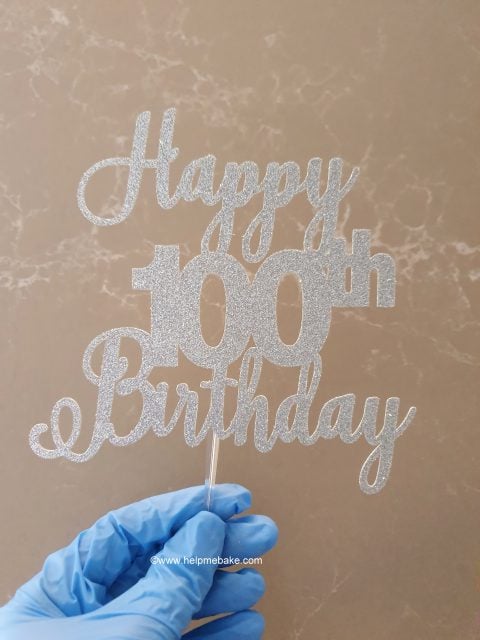
My daughter recently asked me if I would make a cake for one of her close friend's Great Nan's 100th birthday, and I thought it would be the perfect opportunity to make the milestone cake and use one of the sparkly cake toppers at the same time.
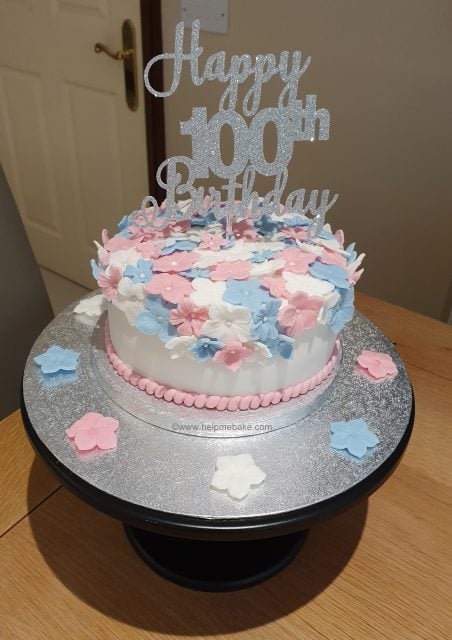
After being informed that the cake was for a small gathering, I set about sourcing a cake topper to give the cake some height and a little bit of bling. (If you make it to 100 years old, you want to have something a little extra special on your big day, don't you).
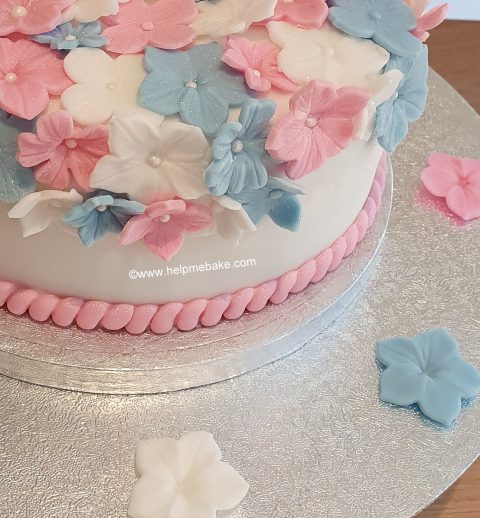
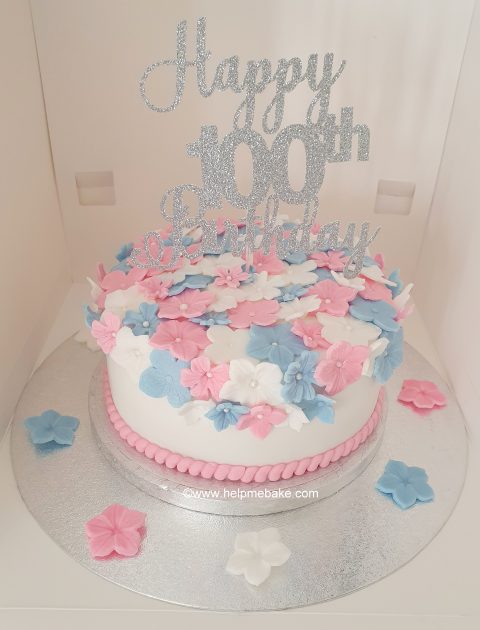
So having used pink and blue before on my Mother-In-Laws 70th birthday cake, I thought I would make some Petunia and Hydrangeas and mix up the colour scheme with a pop of white to break it up a little.
Cake:
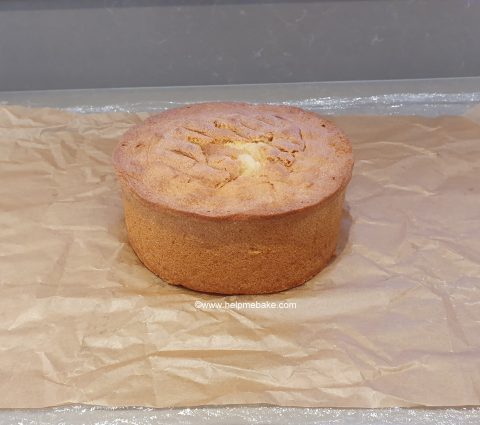
To start with, I made a 7-inch classic Madeira cake.
I then levelled the cake using a cake leveller.
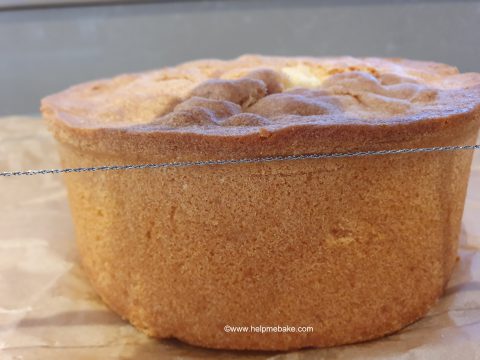
I discarded the excess cake, then flipped the cake over and adjusted the leveller to the next height. (Thus, meaning the top now becomes the bottom of the cake).

I then moved the cake leveller through the cake in a side to side motion until it split into two pieces, making way for the filling.
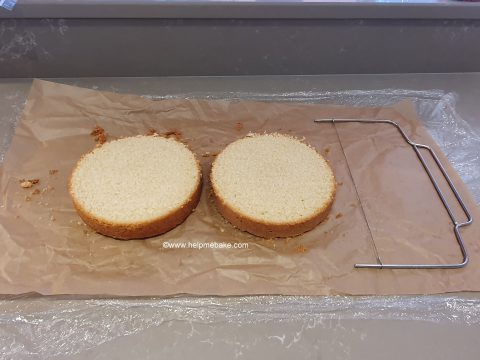
I usually put buttercream on one side and jam on the other. However, because my buttercream was a little cold, it wouldn't stick to the cake as I'd hoped, so to resolve the issue, I put a light coating of jam on both pieces and then piped buttercream on top of the jam to make it stick.
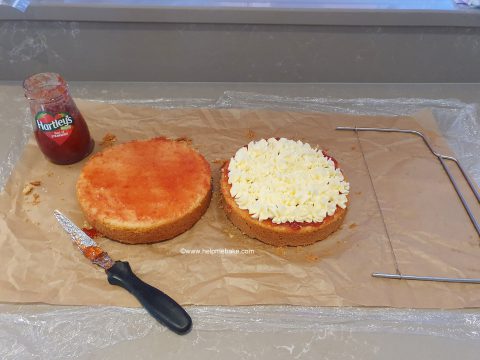
Once filled, the layers were pushed back together. As you can see from the picture, the buttercream does not meet the end of the cake. This needed to be resolved before covering; otherwise, there would be a prominent ridge around the cake.
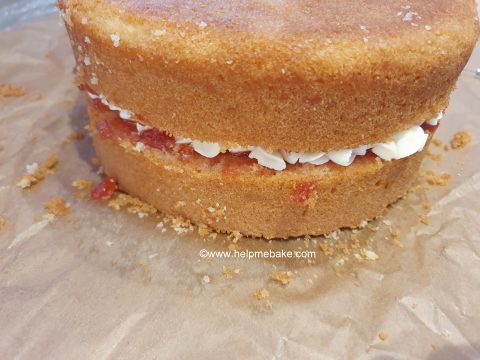
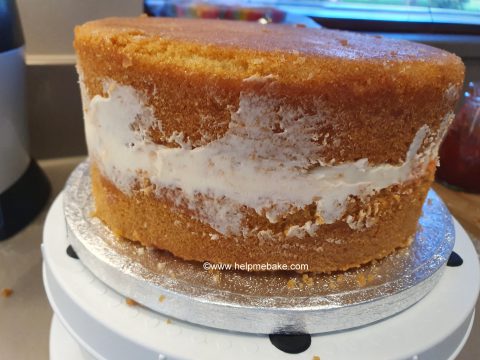
To do this, I piped additional buttercream around the centre and then smoothed it off using a palette knife.
You can cover the whole cake in buttercream before icing, but I tend to use jam as it's much quicker.

The cake is now ready to be covered with your rolled out icing fondant and placed over the cake.
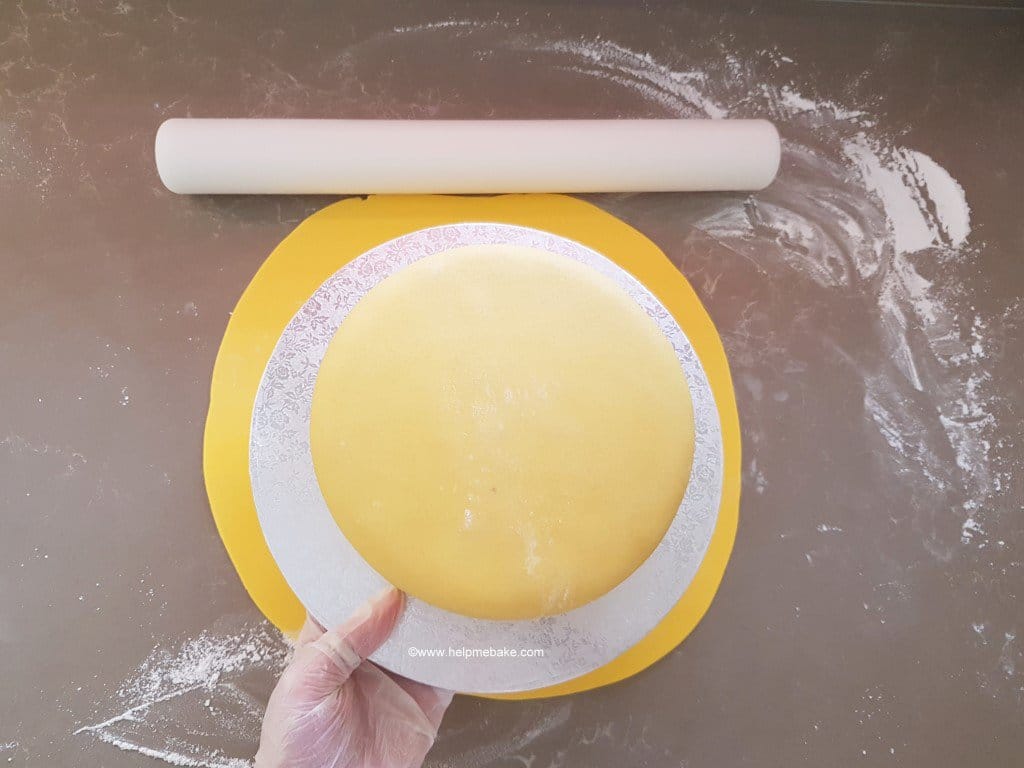
How to cover a cake with icing fondant or marzipan.
I've put together a step by step guide showing you an easy way of rolling out your icing fondant or marzipan and then applying it to your cake. Please note that for sponge cakes, buttercream, jam and frosting form an adhesive that allows your icing/fondant to stick to your cake. However, if...
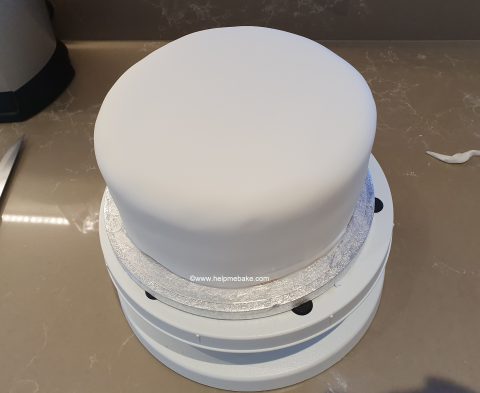
Once covered, I then used cake smoothers to flatten out the icing fondant. You'll notice that the cake isn't perfectly circular; however, this doesn't matter because all the flowers on the top will obscure the shape.
Flowers:
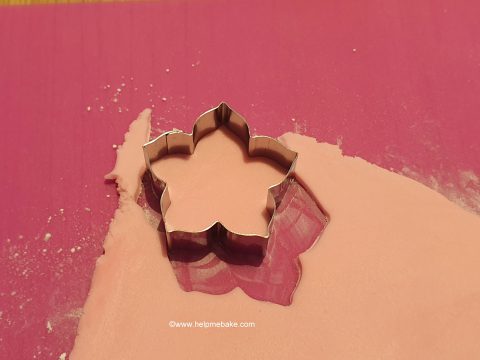
The first cutter set I used was for the Petunias.

I rolled out icing fondant slightly thicker than I usually would when making standard flowers and cut it to shape using the largest cutter.
I then pushed the flower shape out of the cutter onto the mould using a paintbrush and pressed the mould down on top of the icing fondant to make the impression.
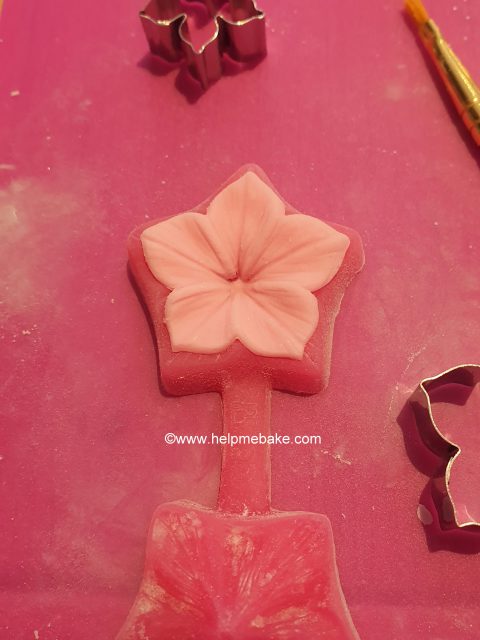
I'd love to tell you that all the flowers came out perfectly formed, but they didn't; there is a knack to using this veining mould, but I'll talk more about that when I review the item.
Now to the Hydrangeas:
Again roll out the icing to about 2-3mm, you are going to squash it between two moulds, so it is fine to be thicker than usual.
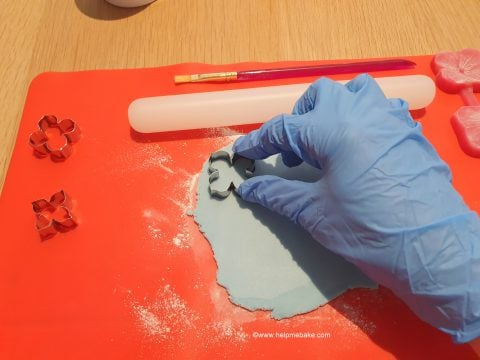
Like before, place the cut flower onto the mould using a soft paintbrush.
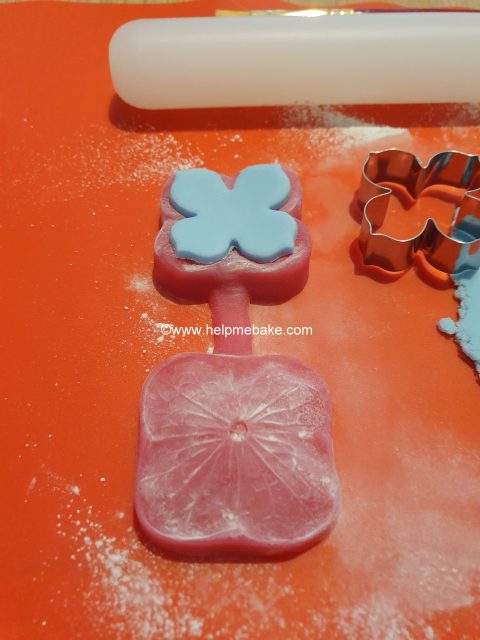
Then flip the mould on top of the flower and press down to get the impression/veining.
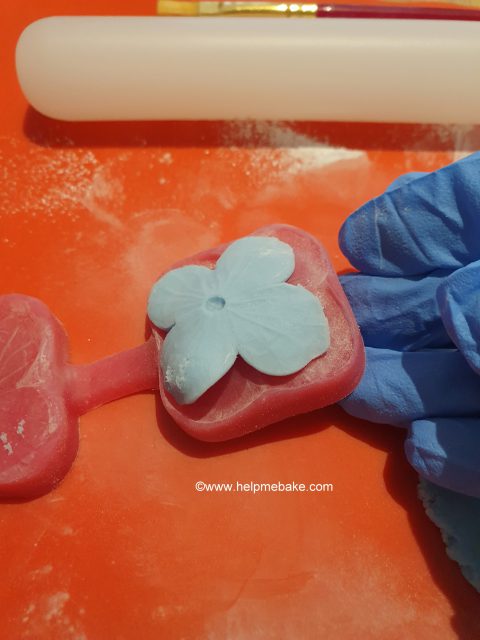
Then turn it over to see the flower.
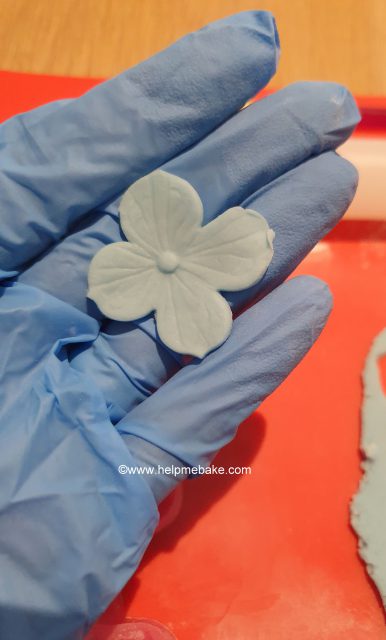
Once you have cut out enough flowers, you can assemble your cake.
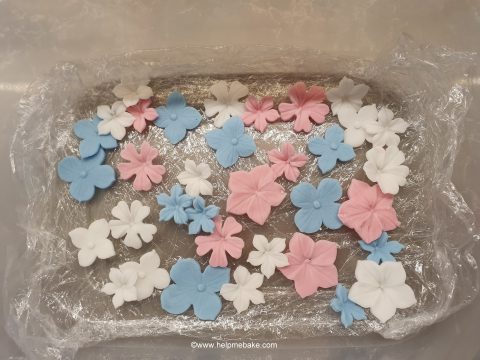
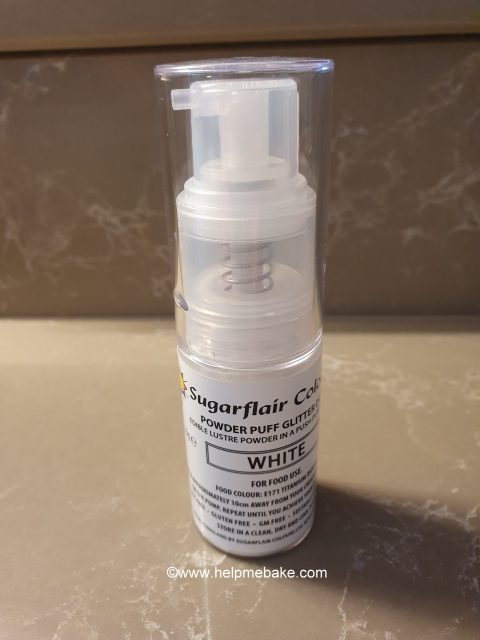
I stuck them to the top of the cake using edible glue. I then placed edible pearls into the flowers' centre and then sprayed them with edible lustre dust.
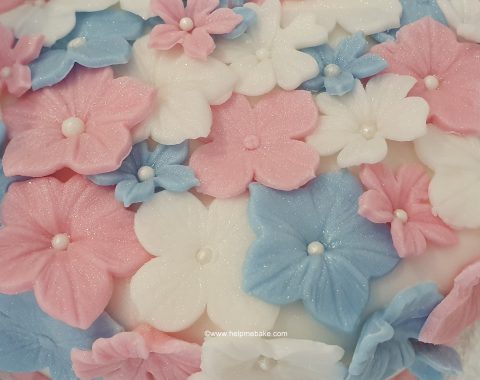
This gave the flowers a shimmer effect.
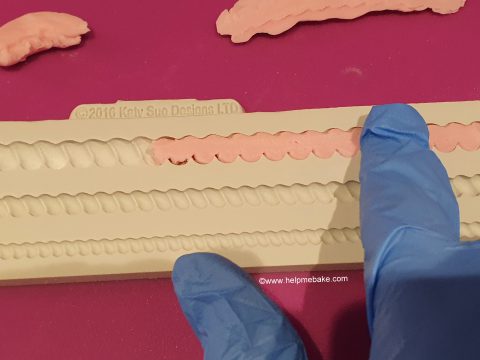
Rope:
The rope was made using rolled up icing fondant with a small amount of Tylo/CMC in it, which was squashed into the mould using my fingers.
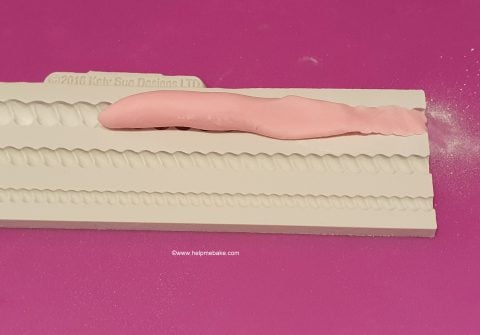
The excess icing fondant is then removed using a sharp knife.
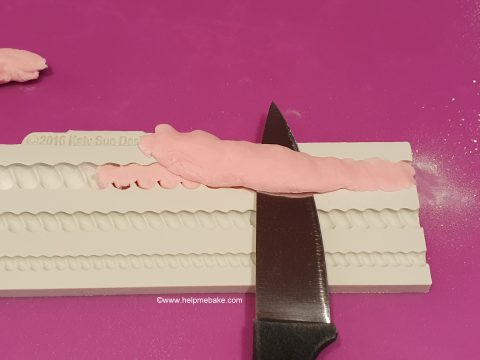
I then smoothed the remaining icing fondant with my finger.
It was removed by bending and expelling it onto a lightly dusted surface.
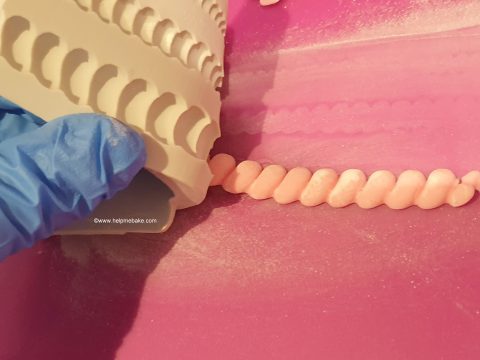
The rope was placed around the base of the cake using a small amount of edible glue.
Topper:
The pre-bought 100th Happy Birthday Cake topper (that I purchased from Lissie Lou) has a glitter message and a plastic insert. The plastic was wiped over with neat alcohol before being pushed into the cake centre to finalise.
Finished Cake:
Last edited: